
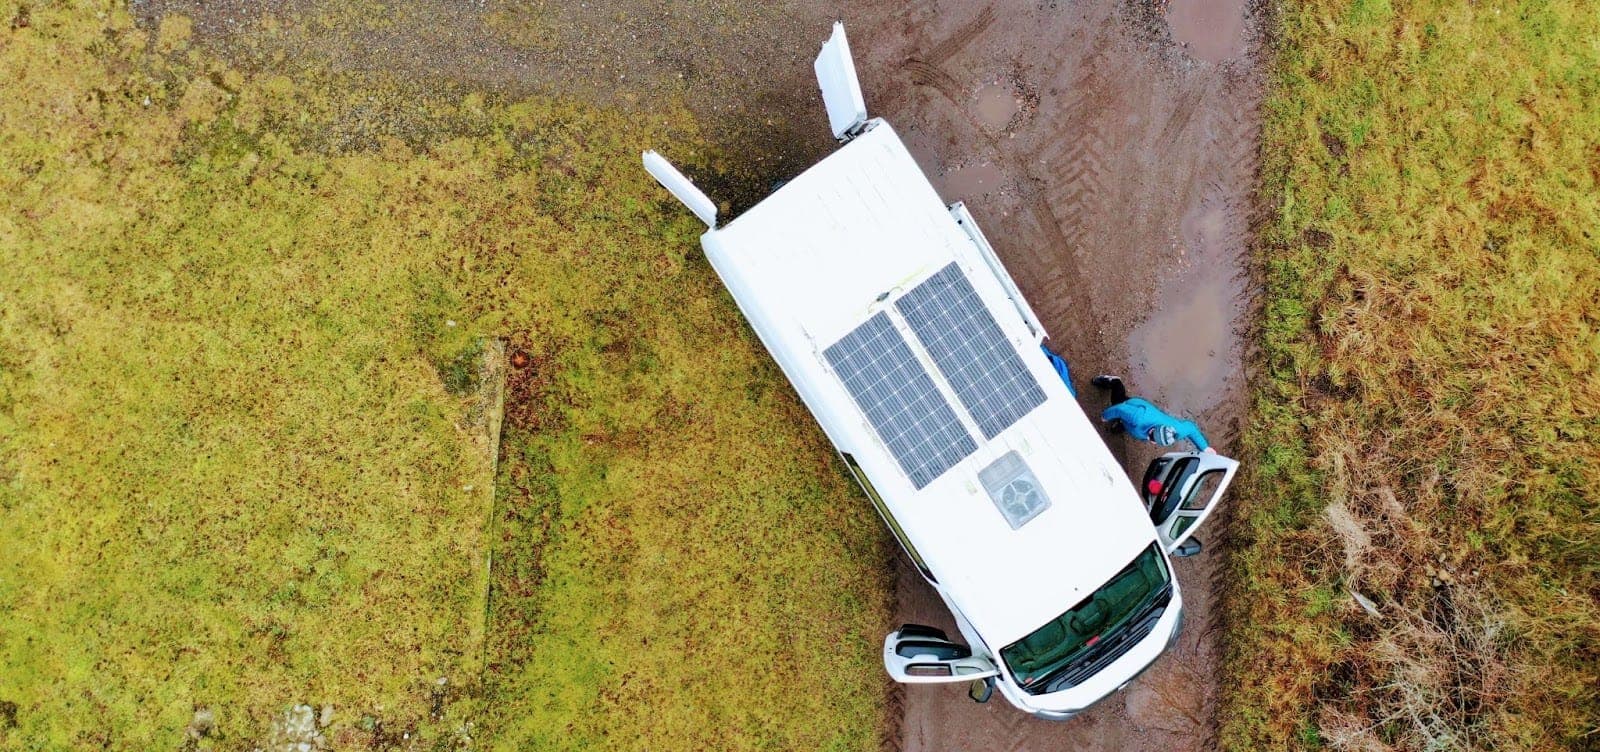
Our favourite aspect of vanlife is freedom. Parked in a remote spot miles from the nearest campsite without a soul in sight.
Solar panels for campervans are the key to enjoying this freedom, allowing us vanlifers to run independently of the grid and campsites. Understanding how solar panels work on a campervan can help you maximise your setup and keep your journey powered wherever the road takes you.
This guide covers everything you need to know: how solar works, what goes into a kit, how to size it, what it costs, how to fit it, and how to keep it running.
Quick Answers
| Question | Short answer |
|---|---|
| How many watts do I need? | 200W–400W suits most campervans |
| Rigid or flexible panels? | Rigid, unless you have a curved or pop-top roof |
| Mono or poly? | Monocrystalline if roof space is tight |
| MPPT or PWM? | MPPT — up to 30% more power to your batteries |
| Series or parallel? | Series, unless you regularly park in partial shade |
| Do I need an inverter? | Only if you're running 230V appliances |
| Typical cost | £160+ for a panel alone, £300+ for a complete kit |
How Do Solar Panels Work on a Campervan?
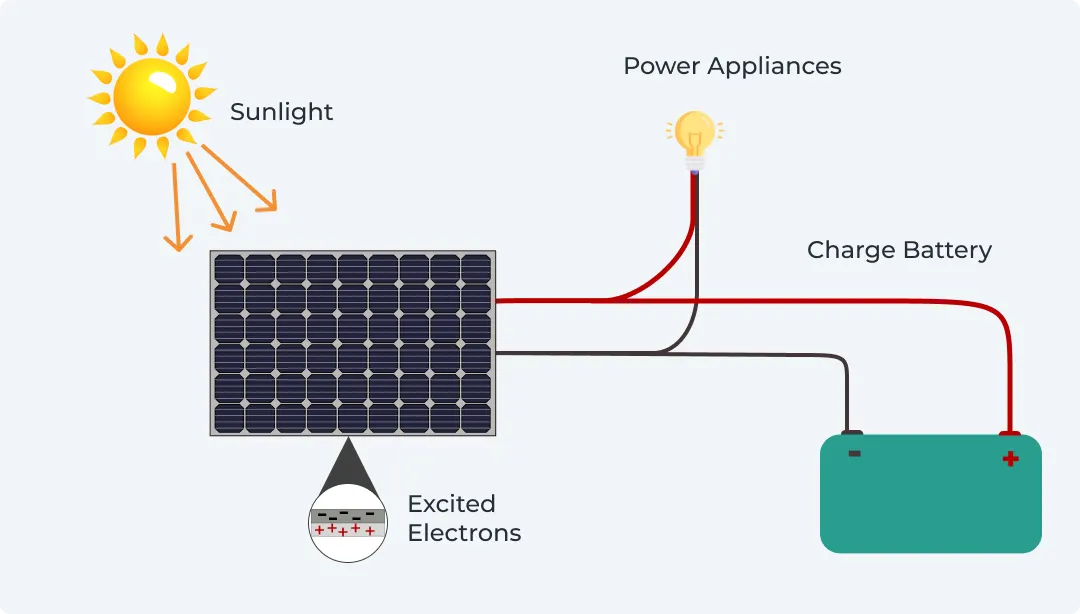
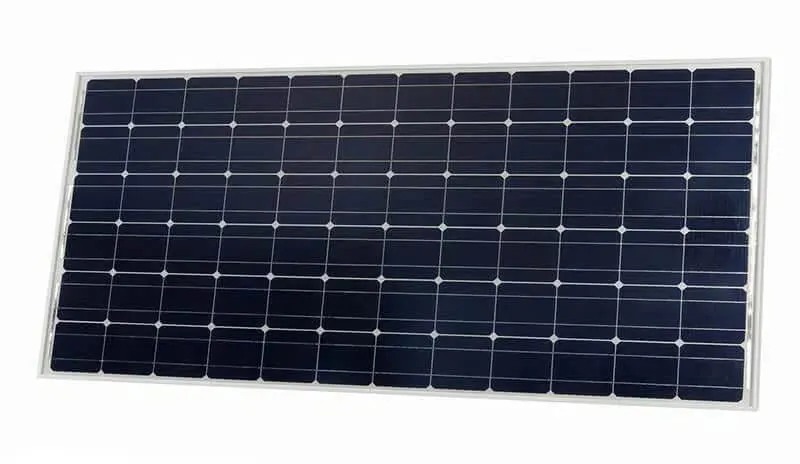
Campervan solar panels harness sunlight and turn it into electricity through photovoltaic cells, which absorb sunlight and generate direct current (DC) electricity.
From there you have two options:
- Store it in a leisure battery for later — powering lights, a fridge, or gadgets day or night
- Use it immediately as it's generated
Most campervans use batteries, because they provide more flexibility and reliability. They let you store excess power during the day, so energy is available even when the sun isn't shining.
The system also includes a solar charge controller, which manages the energy flow and prevents the batteries from overcharging.
New to all this? Our introduction to campervan electrics explains how all the key components work together.
What's in a Campervan Solar Panel Kit?
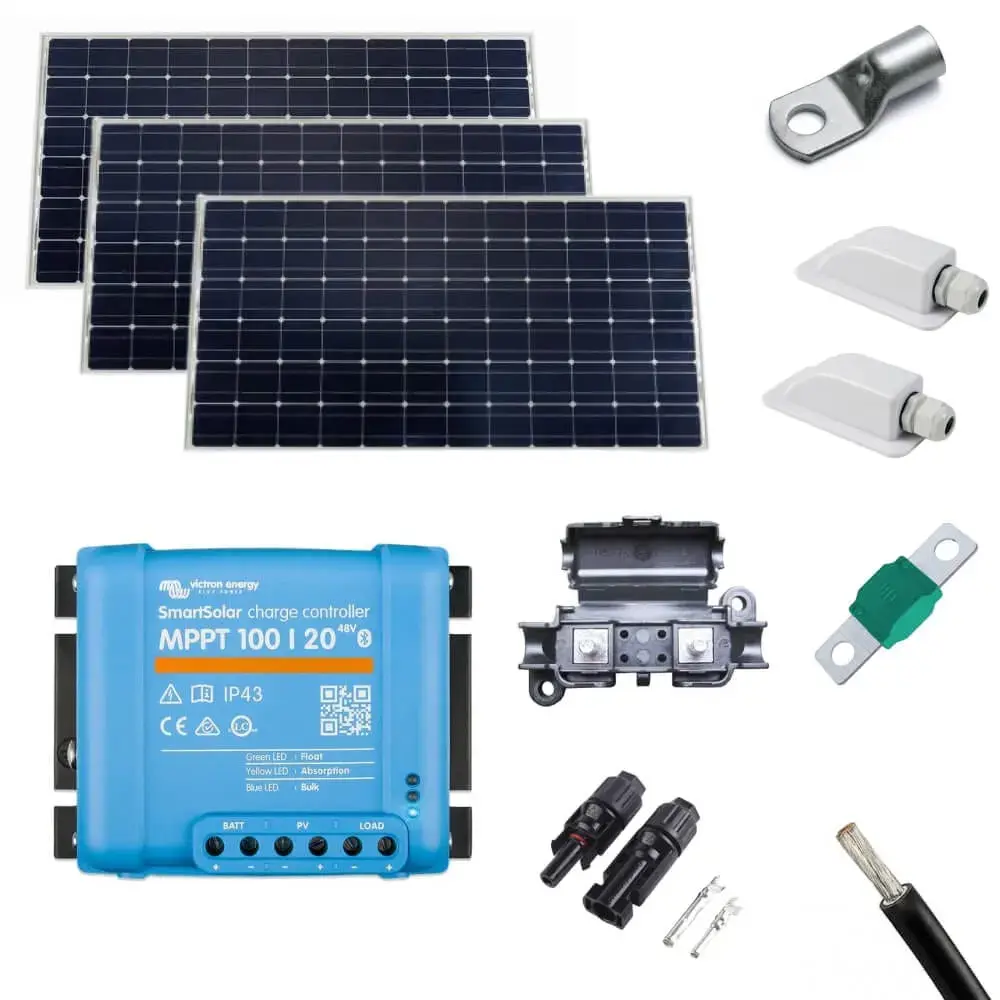
A campervan solar panel kit is a complete package of components designed to convert sunlight into electricity for your van. It typically includes:
- Solar panels
- A charge controller
- Cables
- Mounting hardware
Important: some solar kits include batteries, while others don't. If you need a solar panel kit with a battery, make sure you choose a kit that comes with one.
Each component is covered in detail below — panels, charge controllers, inverters, batteries, and the cables and fuses that tie it all together, and you can dive into our campervan solar panel kits here.
Choosing a campervan solar panel kit
If you’d prefer pre-matched components and simple wiring, our campervan solar kits with panels and MPPT controllers bundle the key parts together. The alternative to this is to work out your power needs below, before making your decision on which kit you should go for.
- Budget: Solar kits range from budget-friendly to high-end. A basic kit might cost less upfront, but it may not meet all your needs if you use many devices. Investing in a more comprehensive kit could save you money in the long run by avoiding the need for upgrades.
- Space: Campervans have limited roof space. Measure your roof area and match it with the dimensions of the panels included in the kit.
- Installation ease: Some kits are designed for easy installation and are easier to install than others. If you're handy with tools, you might be comfortable with a more complex setup. If not, look for a kit with straightforward instructions and fewer components. Alternatively, consider hiring an auto electrician to install your solar panel kit. Even with a DIY-friendly kit, safe fitting still requires some electrical knowledge, and following a step-by-step guide on how to install campervan solar panels can make the process much smoother.
- Long-term goals: Think about how you'll use your campervan now and in the future. If you're planning longer trips or full-time van life, invest in a more robust kit that can grow with your needs. A smaller, simpler kit might be enough if you only go out on weekends.
If you're on a tight budget and only need to charge small devices, a 200W kit will likely do the job. But if you plan to live off-grid for weeks, investing in a 400W+ kit with more efficient panels and a larger battery is essential.
Price Ranges for Solar Panel Kits
These are prices for complete kits — panel, MPPT charge controller, cables and connectors. For panel-only costs, see What Does Campervan Solar Cost? further down.
Basic Kits (Around £300 - £350):
- Example: 140W Victron Solar Panel System.
- What You Get: These kits typically include a single panel, a SmartSolar MPPT charge controller, cables, and connectors; output is limited to that panel’s voltage and current characteristics. Ideal for small vans or basic setups and simple solar wiring, they provide enough power for lights, phone chargers, and small devices.
- Who it's for: Weekend travellers or those with minimal power needs.
Mid-Range Kits (Around £450 - £600):
- Example: 215W or 280W Victron Solar Panel Systems.
- What you get: These kits offer more power with multiple panels and a higher-capacity charge controller. They can handle larger appliances like fridges and fans, making them suitable for extended trips.
- Who it's for: Vanlifers who spend more time off-grid and need reliable power for multiple devices.
High-End Kits (Above £600):
- Example: 360W or 420W Victron Solar Panel Systems.
- What you get: These comprehensive kits include several high-efficiency panels, a robust MPPT charge controller, and all necessary installation components. For larger systems, that often also means more organised distribution and protection hardware. They provide ample power for full-time van life, supporting everything from kitchen appliances to entertainment systems.
• Who it's for: Full-time vanlifers or those with significant power needs.
Take a look at suitable solar panel list here.
How Much Solar Power Does a Campervan Need?
There's no one-size-fits-all. Sizing a campervan solar system starts by calculating your daily energy use, so the panels, battery, and controller are sized around your actual power requirements. Your needs vary based on how you use your campervan, the appliances you run, and where you travel.
The seven factors that decide your setup:
| Factor | What it means for you |
|---|---|
| Power consumption | Add up the wattage of everything you'll run daily — lights, fridge, phone charging, laptops |
| Time off-grid | A weekend warrior needs less than a full-timer |
| Sunlight availability | Cloudy or shaded regions need more panels to capture the same energy |
| Sun height | Southern Europe generates more than the Scottish NC500 — the sun sits higher, with less cloud |
| Season and climate | Winter output drops, so you may need a bigger setup |
| Battery storage | Too little storage wastes panel output; too much adds weight and fuel cost |
| Roof space | Hard limit on how many panels you can fit |
Pairing a large array with a small battery can leave energy unused and feel like wasted money, so it's worth understanding how to choose the right battery and solar panel kit for your campervan.
Understanding Campervan Solar Panel Watts
"Watts" measures the power solar panels can produce. Most campervan solar panels range between 100W and 400W.
What you need depends on:
- Daily power usage — a few lights and phone chargers? 100W–200W. A fridge or laptop? 300W or more.
- Roof space — more watts means more panels. Tight roof? Choose more efficient panels.
- Sunlight conditions — fewer panels work in sunny regions; boost wattage for cloudier areas.
- Battery capacity — more watts charges your batteries faster; for example, a 100W panel can take about 4.5 days to fully charge a 100Ah battery from empty in good conditions, which matters for high-powered appliances or longer off-grid stints.
Our free campervan electrics tool will tell you exactly how many watts you'll need based on your travel needs, devices, and appliances.
Types of Solar Panels for Campervans
Two things to decide: the structure of the panel, and the technology behind it.
Rigid vs. Flexible
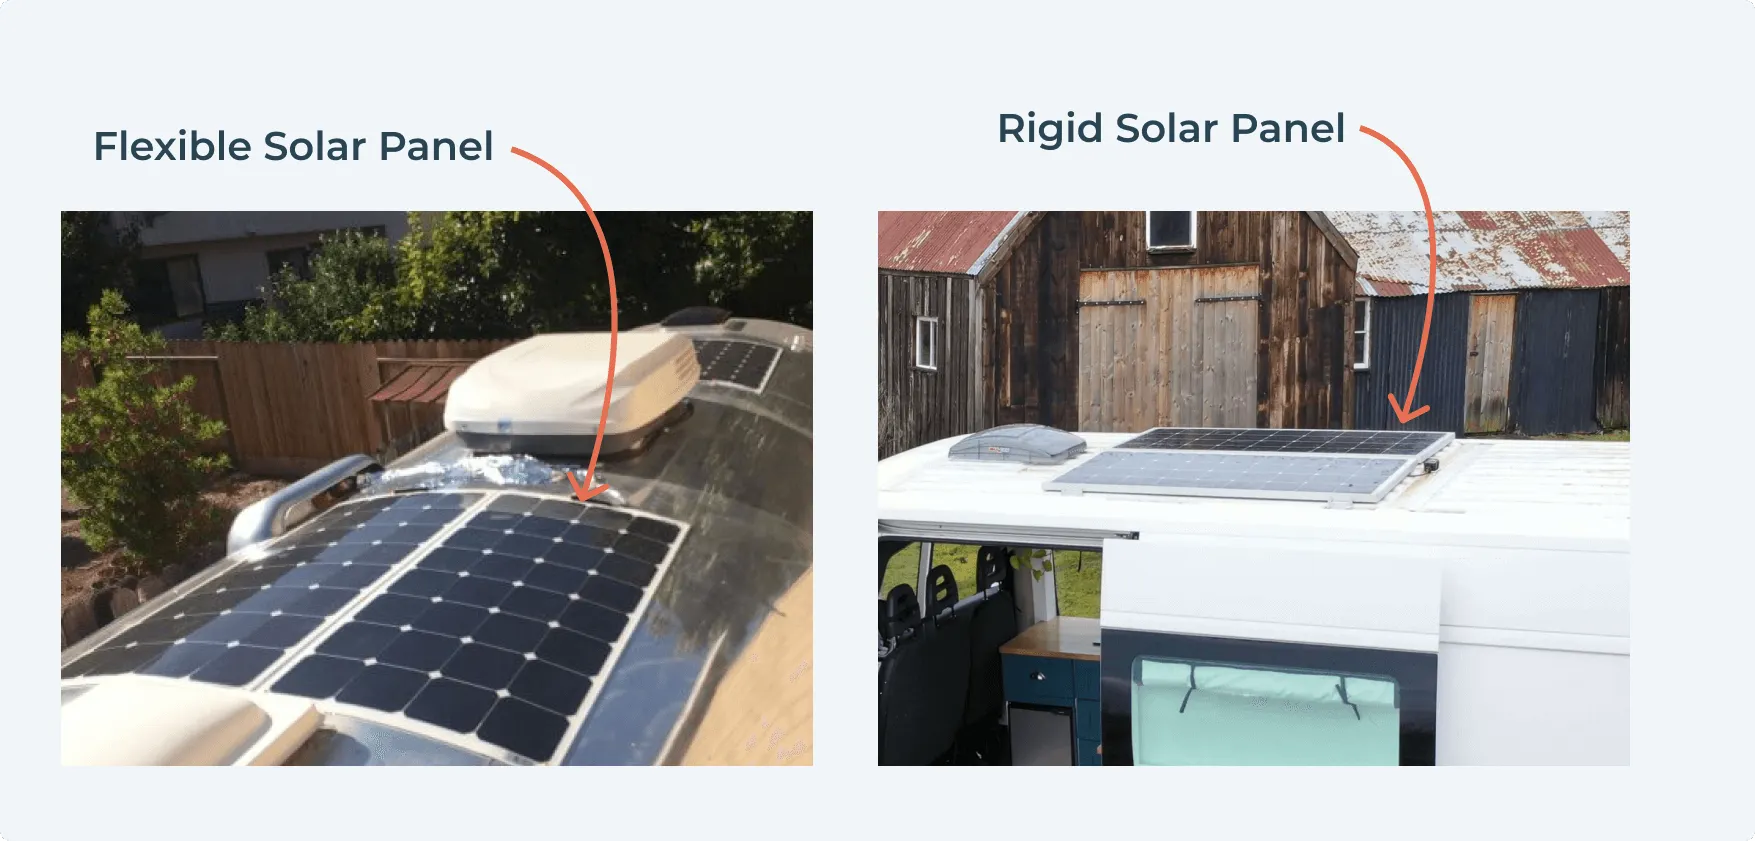
| Rigid | Flexible | |
|---|---|---|
| Efficiency | Up to 25% | Typically a few percentage points lower |
| Cost per watt | Cheaper | More expensive |
| Durability | Protective frame, long-lasting | No frame, quicker wear |
| Best roof | Flat | Curved, pop-top |
| Fitting | Brackets or mounts | Glued directly |
If you have a standard van with a flat roof, rigid panels are usually your best bet. Most larger vans have rigid roofs, which makes installing a flexible panel almost impossible.
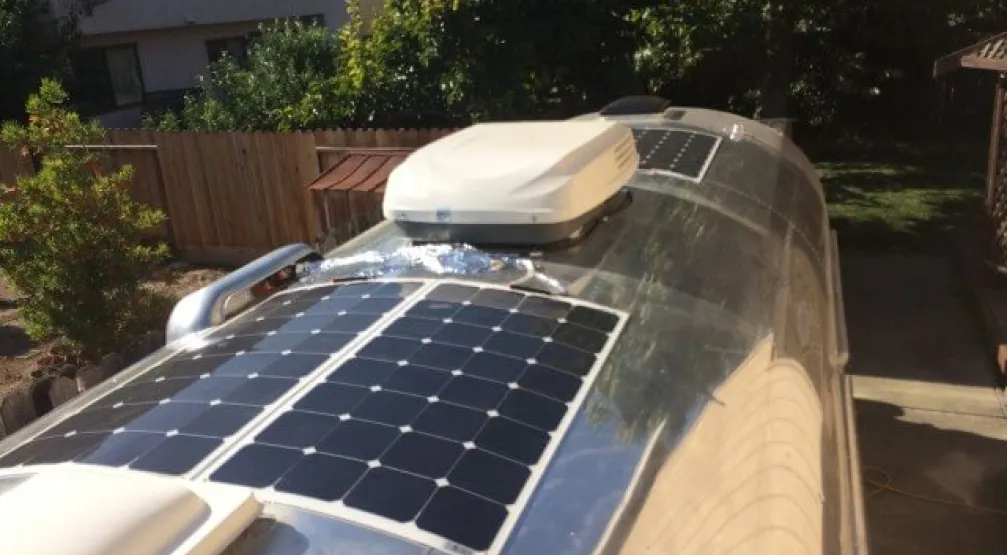
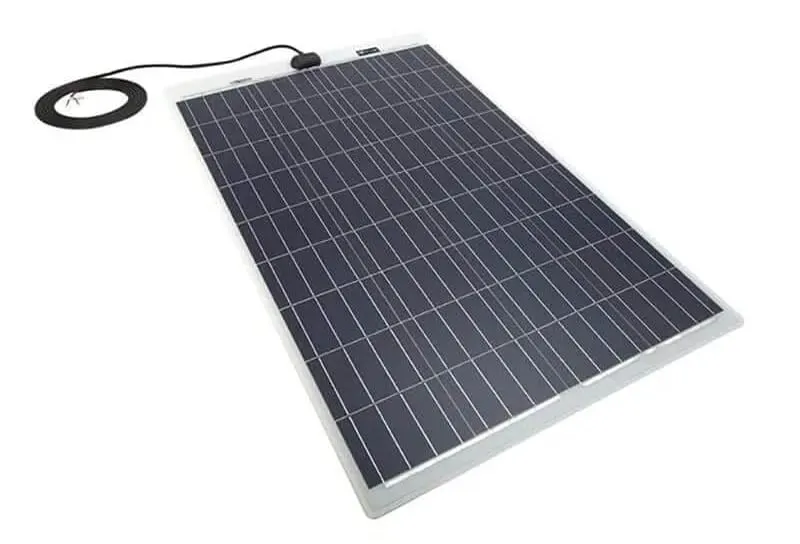
Flexible panels are bendable and lightweight, contouring to curved surfaces. That makes them a low profile choice for stealthier builds like retro motorhomes or VW pop-tops. Often sold as semi-flexible panels, they can be glued directly to the surface, avoiding bulky mounting brackets.
The trade-off: flexible panels are less efficient, more expensive per watt, and tend to degrade faster without a protective frame. Whichever type you fit, correct positioning and airflow help maintain performance.
Monocrystalline vs. Polycrystalline
| Monocrystalline | Polycrystalline | |
|---|---|---|
| Efficiency | Around 20–23% | Around 15–17% |
| Cost | More expensive | More affordable |
| Space needed | Less | More |
| Best for | Limited roof space | Tight budgets with roof to spare |
Polycrystalline panels are made from multiple silicon fragments melted together. They sit around 15–17% efficiency and are slightly bulkier, so you'll need more of them for the same output. Polycrystalline solar panels were historically the budget option, though the price gap has narrowed considerably, and they still usually need more roof area.
So Which Should You Choose?
- Limited roof space + want best performance → monocrystalline
- Budget is the priority + plenty of roof space → polycrystalline
- Flat roof → rigid
- Curved or pop-top roof → flexible
For more unusual van roofs, thin film solar panels such as CIGS may be suitable and suit curved shapes, and they perform better in low-light conditions than silicon panels.
If you expect to fit multiple panels, roof layout and cable routing matter as much as panel type.
Connecting Solar Panels in Series or Parallel
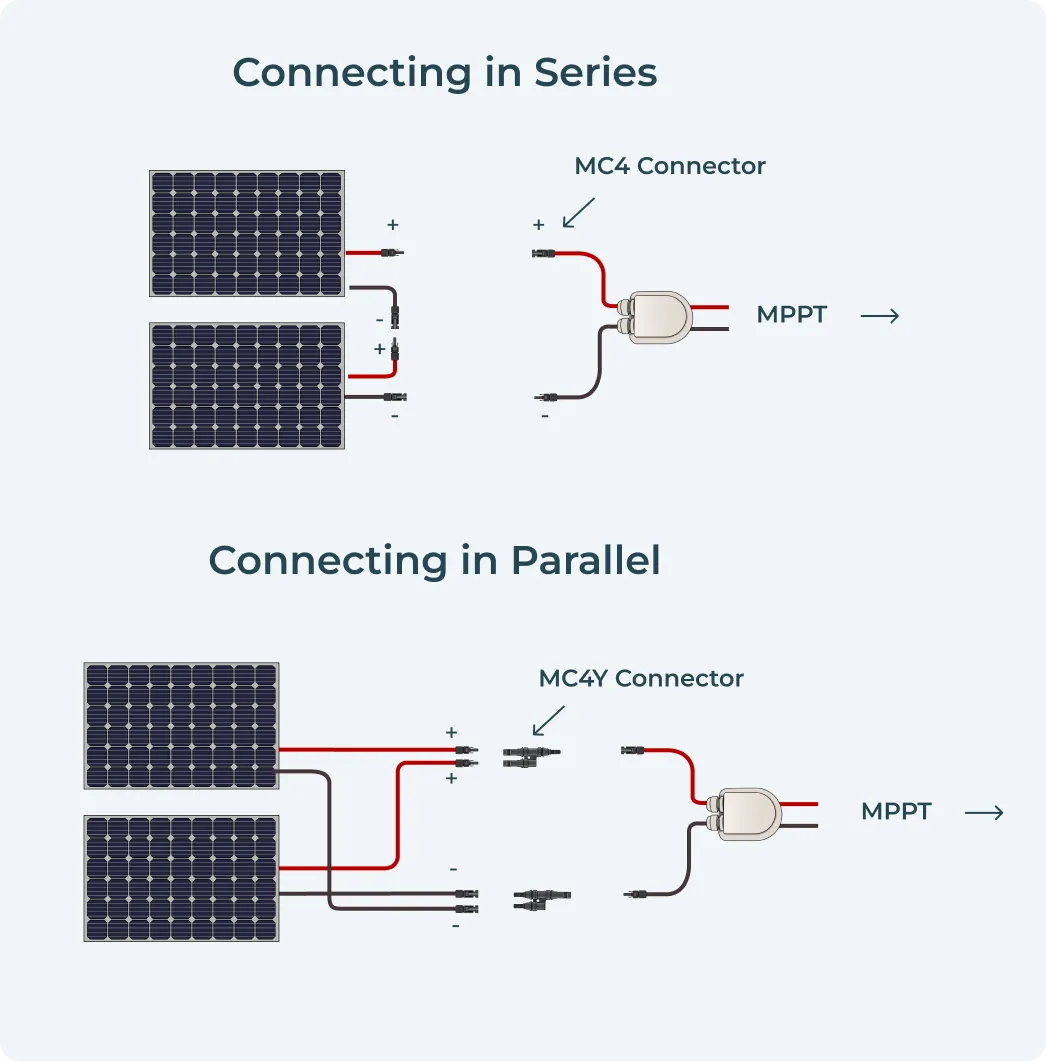
| Series | Parallel | |
|---|---|---|
| Voltage | Increases | Stays the same |
| Current | Stays the same | Increases |
| Cable thickness | Thinner cables fine | May need thicker cables |
| Shading | Affects the whole array | Each panel works independently |
| Charging window | Longer each day | Shorter, but higher current |
In parallel, current increases while voltage stays the same. Once your panels reach 14V or more, the higher current results in more charge flowing into your batteries. The big advantage is shade resilience: each panel operates independently, so one shaded panel won't drag down the rest.
Our Recommendation
Go series. A series connection maximises the time your system can charge the batteries daily, which is crucial for generating the most energy in less-than-ideal weather.
Just bear in mind that shading has a significant impact on series-wired panels, because it affects the entire array rather than a single panel.
Got four panels or more? Consider series-parallel for the best of both worlds — higher voltage and increased current.
Choosing MPPT Charge Controllers
Sticking a solar panel on your campervan roof might seem straightforward, but managing the power it generates is where things get tricky.
Solar panels produce varying current and voltage levels throughout the day, so you can't connect them directly to your batteries without risking damage. That's where a solar charge controller comes in — think of it as a middleman between your panels and your batteries, regulating the power flow so your batteries charge safely and efficiently.
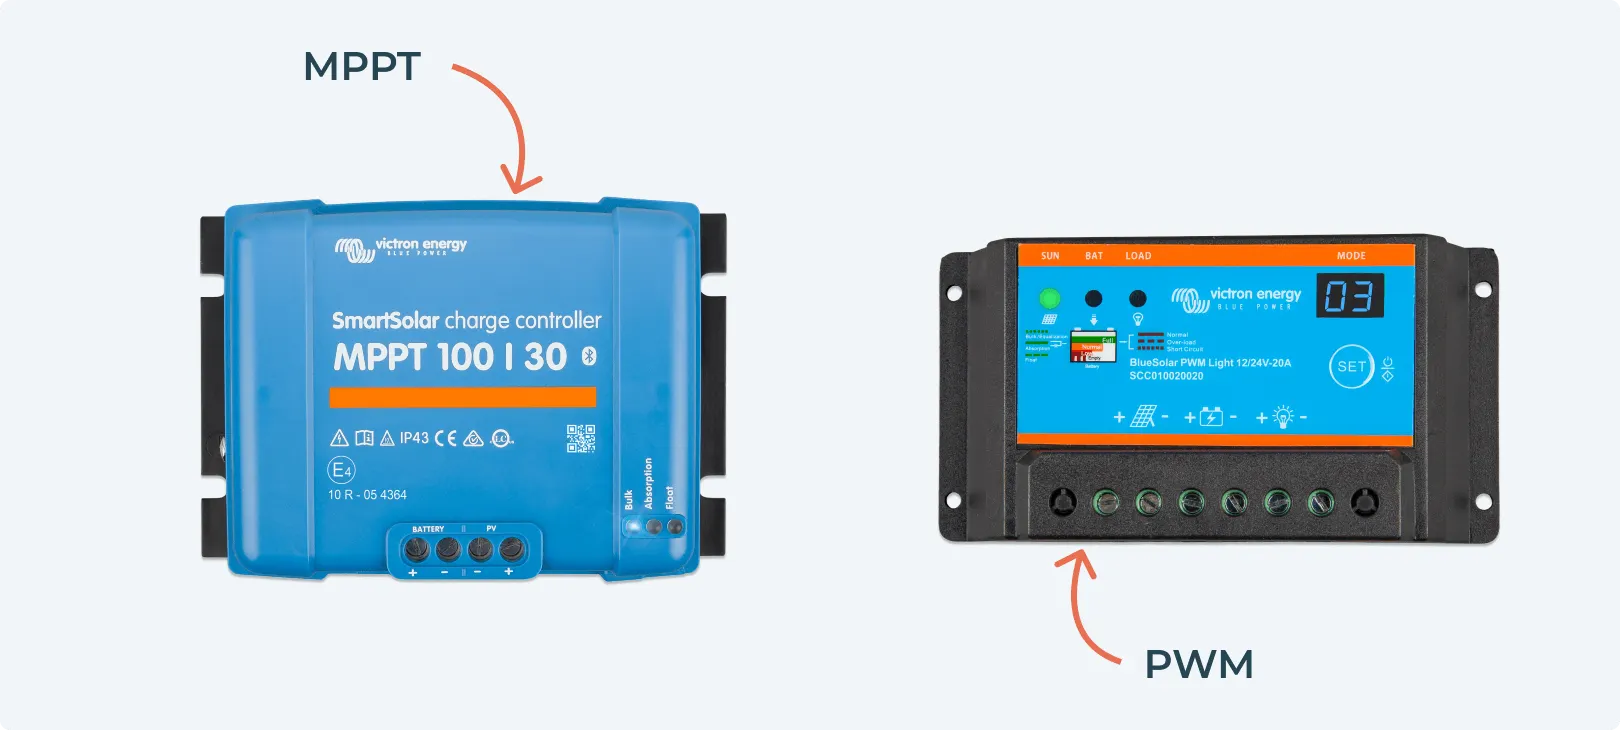
| PWM | MPPT | |
|---|---|---|
| Cost | Cheapest | Higher |
| Efficiency | Lower | Up to 30% more power delivered |
| How it works | Reduces power as battery nears full charge | Tracks panel max voltage and adjusts to what the battery can take |
| Best for | Tight budgets | Most van setups, especially with limited roof space |
Reading the Specs
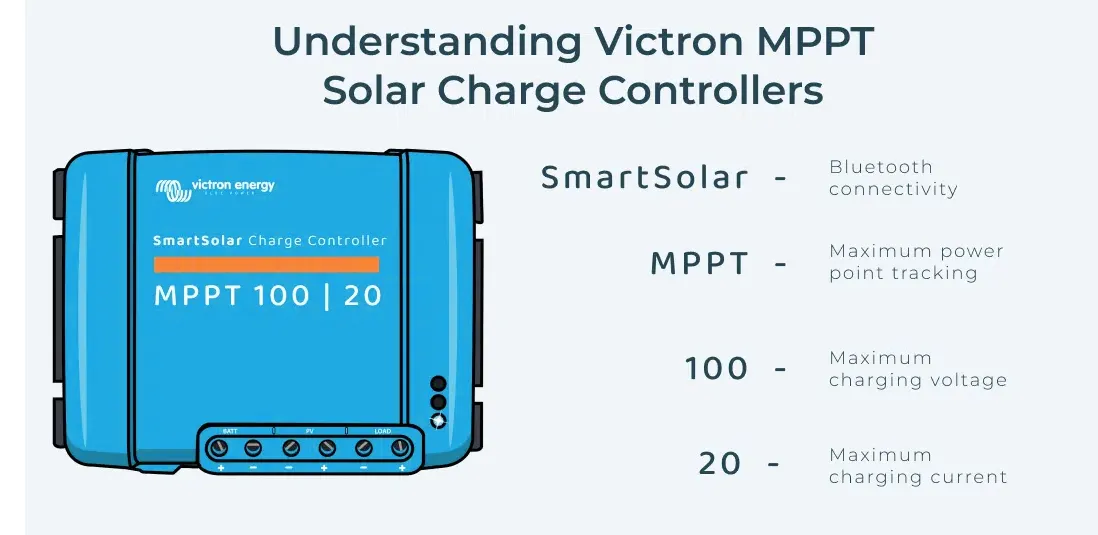
Two numbers matter when selecting a charge controller:
- Maximum input voltage — must match your solar panel setup, and should be above 14V for charging a 12V battery
- Maximum output current — determines how quickly your batteries charge; the higher the current, the faster the charge
If this sounds overwhelming, don't worry. Our free off-grid calculator automatically selects the correct charge controller for your system.
We work closely with the experts at Victron Energy, who supply us with MPPT controllers and have some excellent, in-depth resources available. For example, the Victron SmartSolar MPPT charge controller has built in bluetooth so you can monitor performance in the VictronConnect app, and its automatic voltage detection helps reduce setup error during installation, especially on small systems. Check out their MPPT sizing calculator if you want to get into the nitty-gritty — or let our off-grid calculator do it for you.
Do You Need an Inverter?
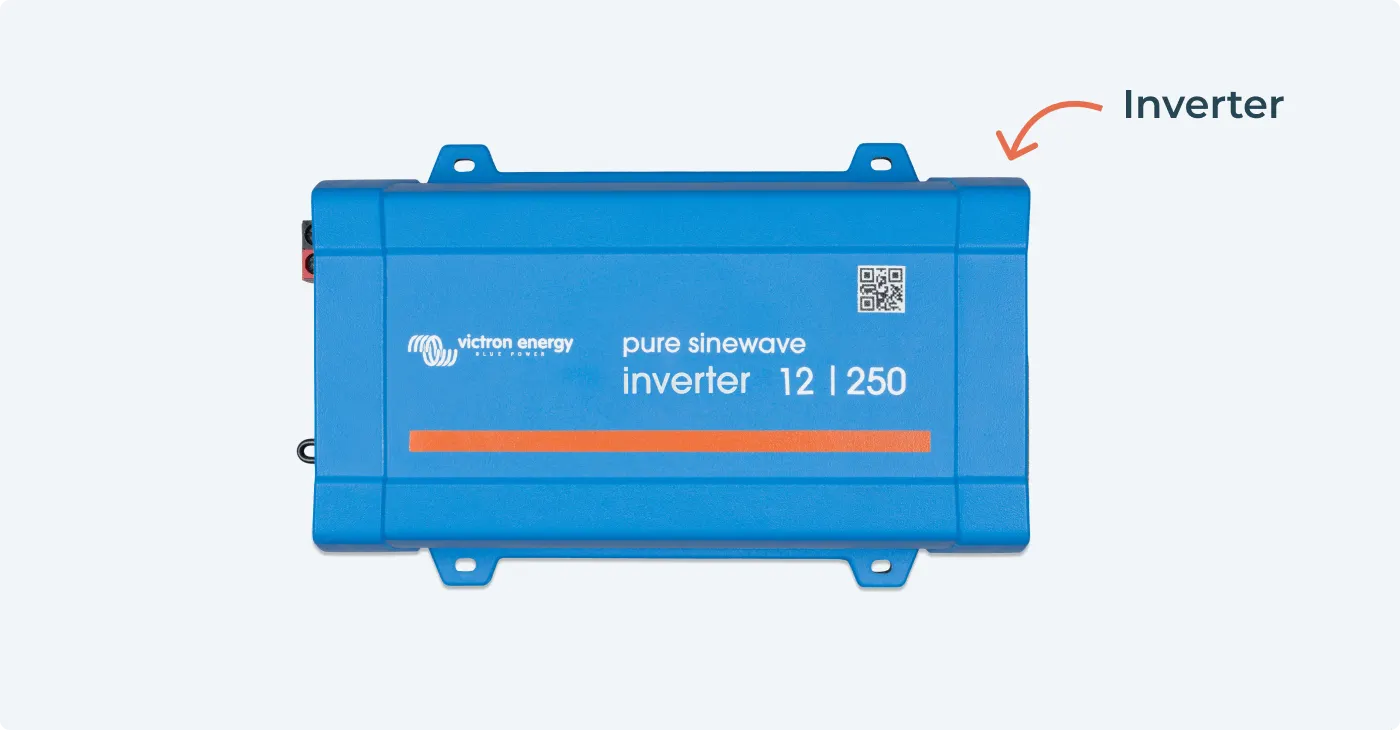
Short answer: only if you're running 230V appliances. If you're only powering 12V appliances, you don't need one.
An inverter converts DC (direct current) from your panels and batteries into AC (alternating current), which is what most standard-plug appliances need — laptops, kettles, and similar.
| Pure sine wave | Modified sine wave | |
|---|---|---|
| Power quality | Clean, identical to a home outlet | Choppier |
| Cost | Higher | Cheaper |
| Safe for | Sensitive electronics, laptops, medical equipment | Phones, LED lights, small fans |
| Risk | None | Can shorten lifespan of sensitive electronics |
Choosing a Battery for Your Solar Setup
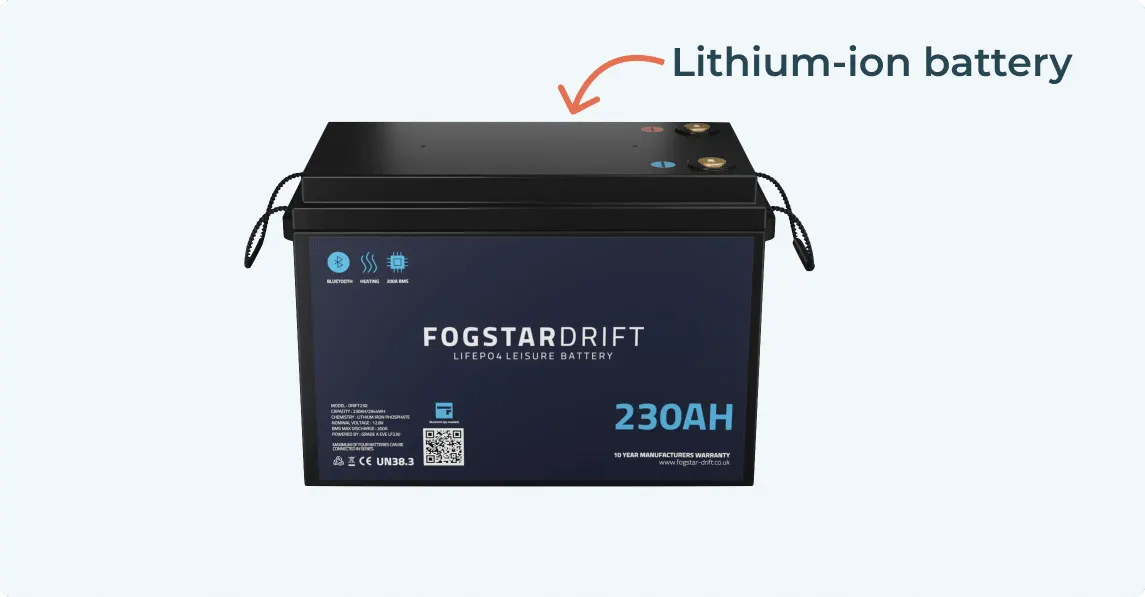
The leisure battery stores power generated by your solar panels, so you can use it when the sun isn't shining. Some setups use a battery bank of several batteries to increase storage.
| Lead-acid | AGM | Lithium-ion | |
|---|---|---|---|
| Cost | Cheapest | Middle | Most expensive |
| Weight | Heavy | Heavy | Lightest |
| Lifespan | Shortest | Medium | Longest |
| Maintenance | Regular | None (sealed) | None |
| Depth of discharge | Limited | Limited | Deep |
| Cold weather | OK | OK | Won't perform below 0°C without heating |
- Tight budget, occasional off-grid use → AGM
- Long-term reliability and weight savings → lithium-ion
- Budget setups or infrequent use → lead-acid (though most solar kits skip it these days)
For a deeper dive into capacities, lifespan, and choosing between lithium and AGM, see our guide on how to choose a campervan leisure battery.
Cables, Mounting Hardware, and Fuses
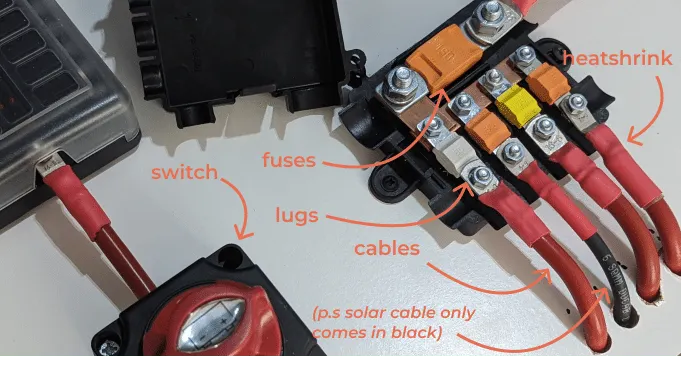
Easy to overlook, but essential for a functional and safe setup.
Cables
- Must be the correct gauge (thickness) to handle the current safely
- Wrong gauge causes voltage drops or overheating
- Longer runs or higher current need thicker cables
- Cable sizing must match the expected load
Mounting hardware
- Brackets, screws, and adhesive mounts
- Rigid panels usually need more secure mounts
- Flexible panels can often be glued down
Fuses
- Your fuse is there to protect your cables
- The fuse on the positive wire should be rated lower than the max rating of your cable
- The maximum fuse size must never exceed the cable's safe capacity
- That way, if there's a current spike, the fuse blows before the wire overheats
Campervan solar wiring diagram
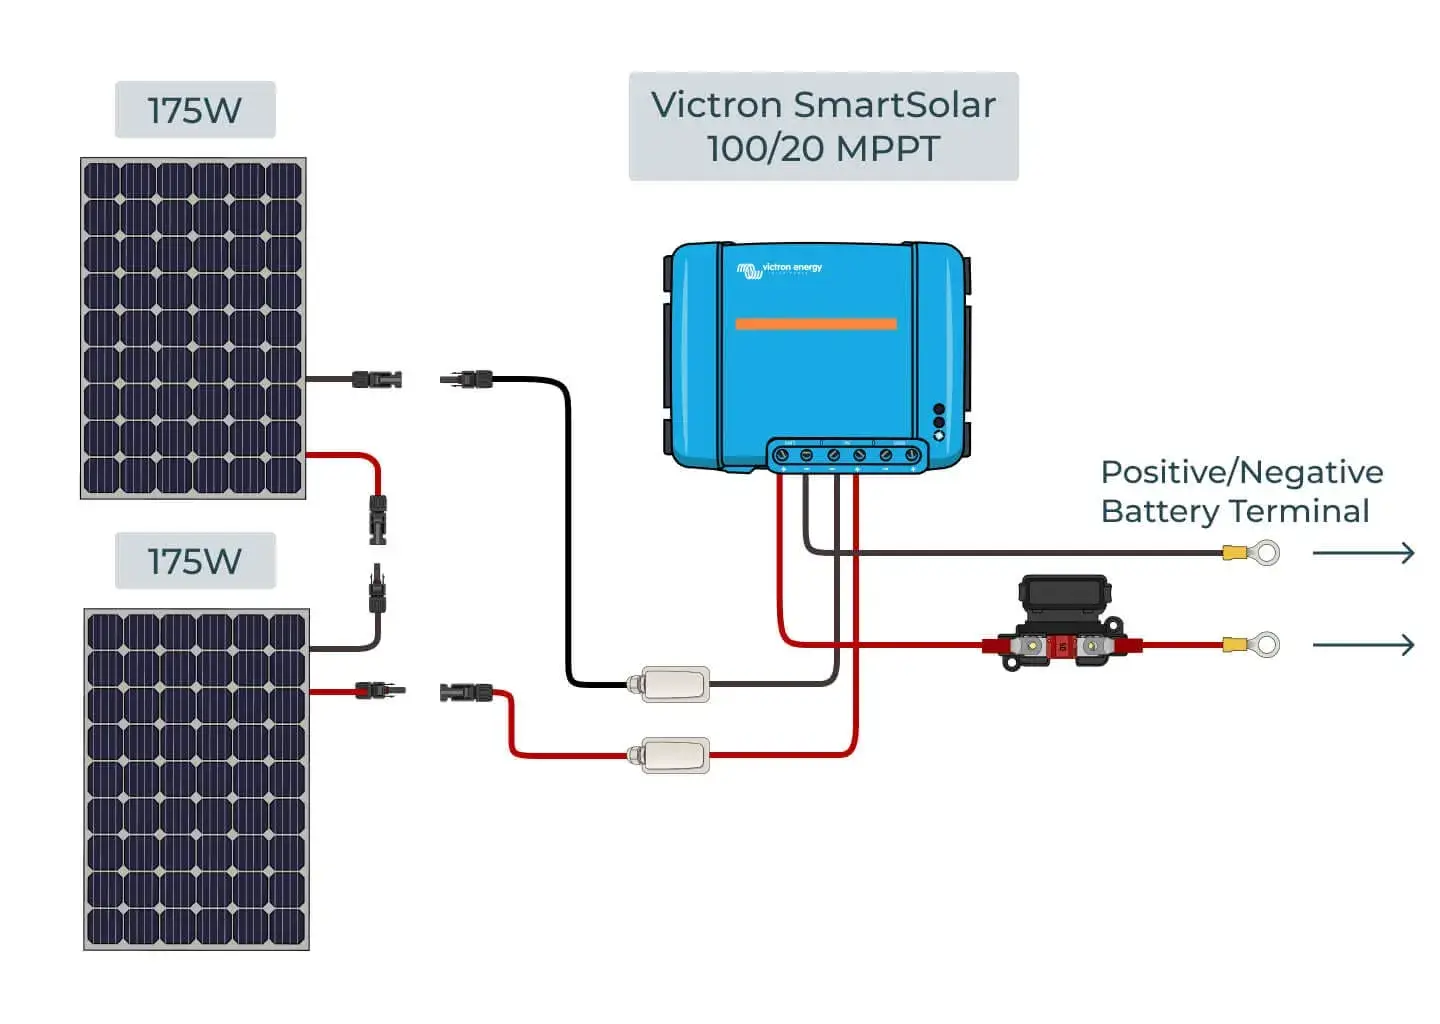
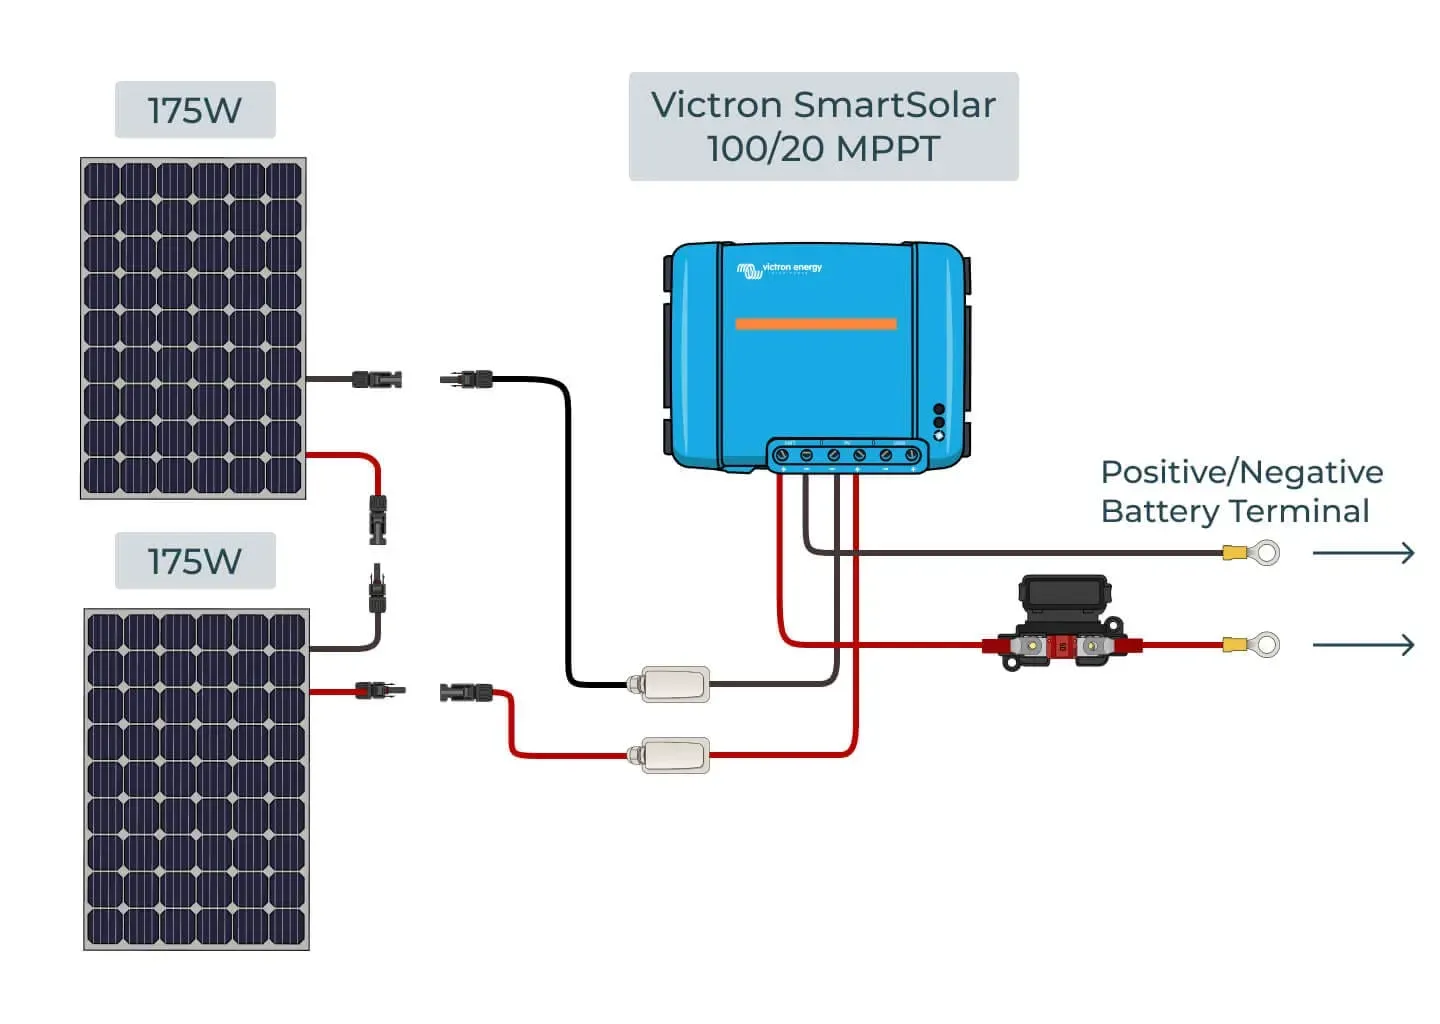
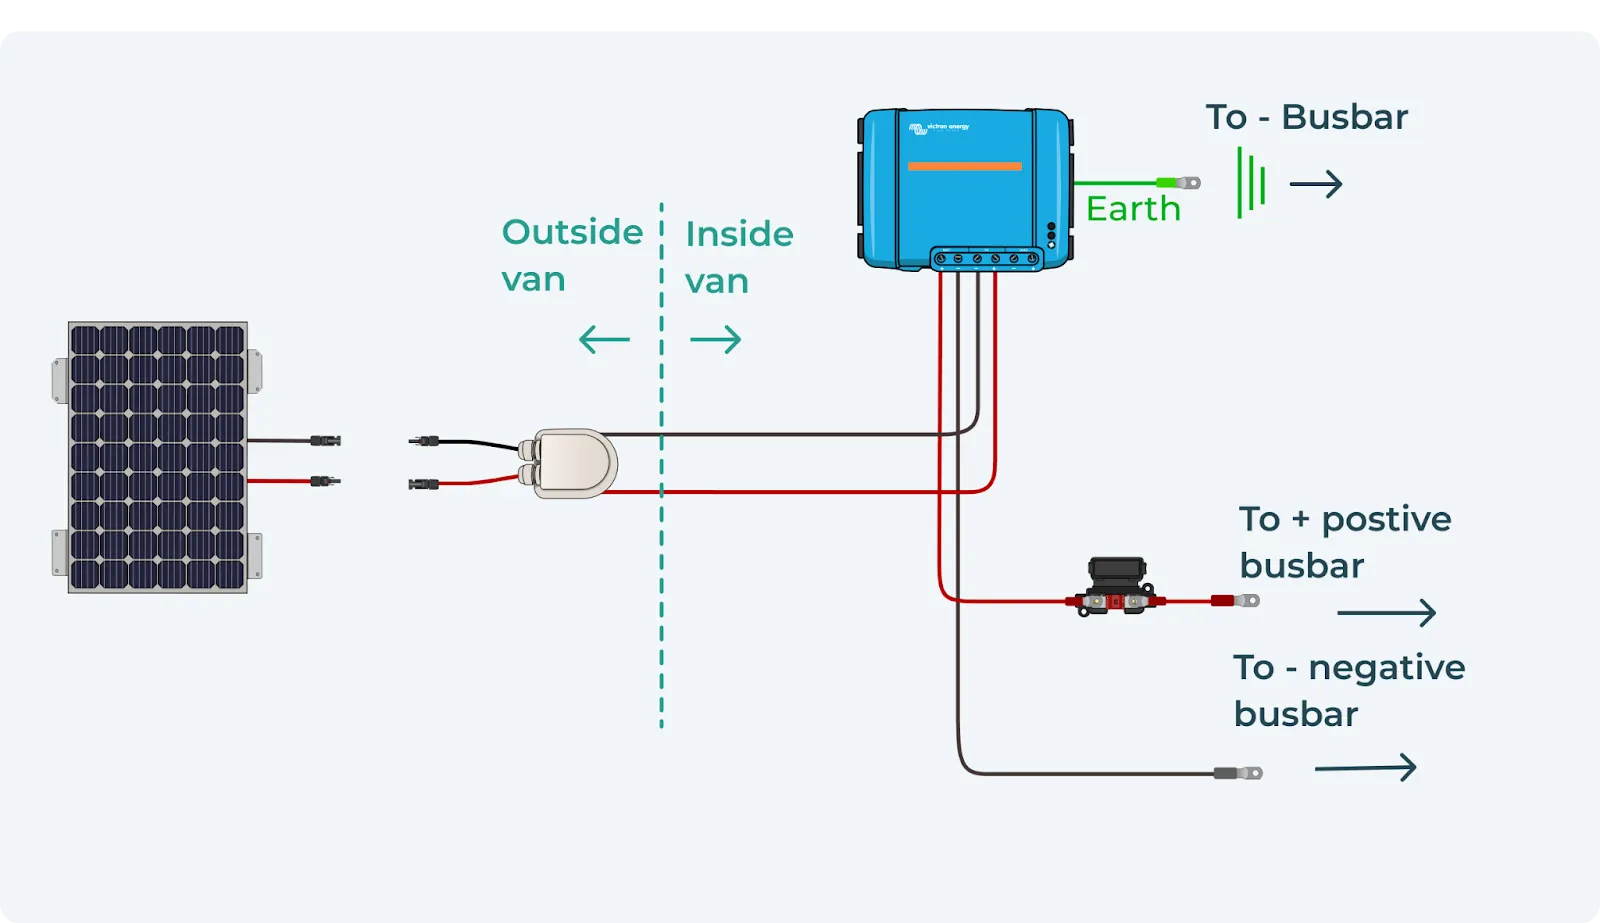
A campervan solar wiring diagram shows how every component connects — panels, charge controller, leisure battery, fuses, busbars, and inverter — and, just as importantly, in what order.
Follow the chain from roof to battery:
- Panels to each other — wired in series or parallel, joined with correctly crimped MC4 connectors.
- Panels into the van — through a waterproof cable entry gland. Roof cable must be PV-rated: EN 50618 H1Z2Z2-K. Standard PVC cable degrades under UV within a couple of years.
- Panels to the charge controller — connect the battery to the controller first, then the panels. Most MPPT controllers detect system voltage from the battery.
- Charge controller to the leisure battery — fuse on the positive cable, as close to the battery as possible.
- Battery to a busbar or fuse block — where your 12V circuits branch off: lights, fridge, USB sockets.
- Battery to the inverter, if you're running 230V — its own suitably rated fuse and cable.
- Negative busbar to the vehicle chassis — your common ground.
Three things the diagram exists to stop you getting wrong:
- Polarity. Positive to positive, negative to negative, at every join.
- Fuse placement. Every positive cable needs a fuse rated below the cable's safe capacity, sited as close to the power source as possible — so the fuse blows before the wire overheats.
- Cable gauge. Sized for the current it carries and the length of the run. Undersized cable means voltage drop and heat.
Every Vunked order includes a personalised wiring diagram showing all wiring and fuse sizes for your exact components, alongside a full installation guide.
How to Fit Solar Panels to a Campervan or Motorhome
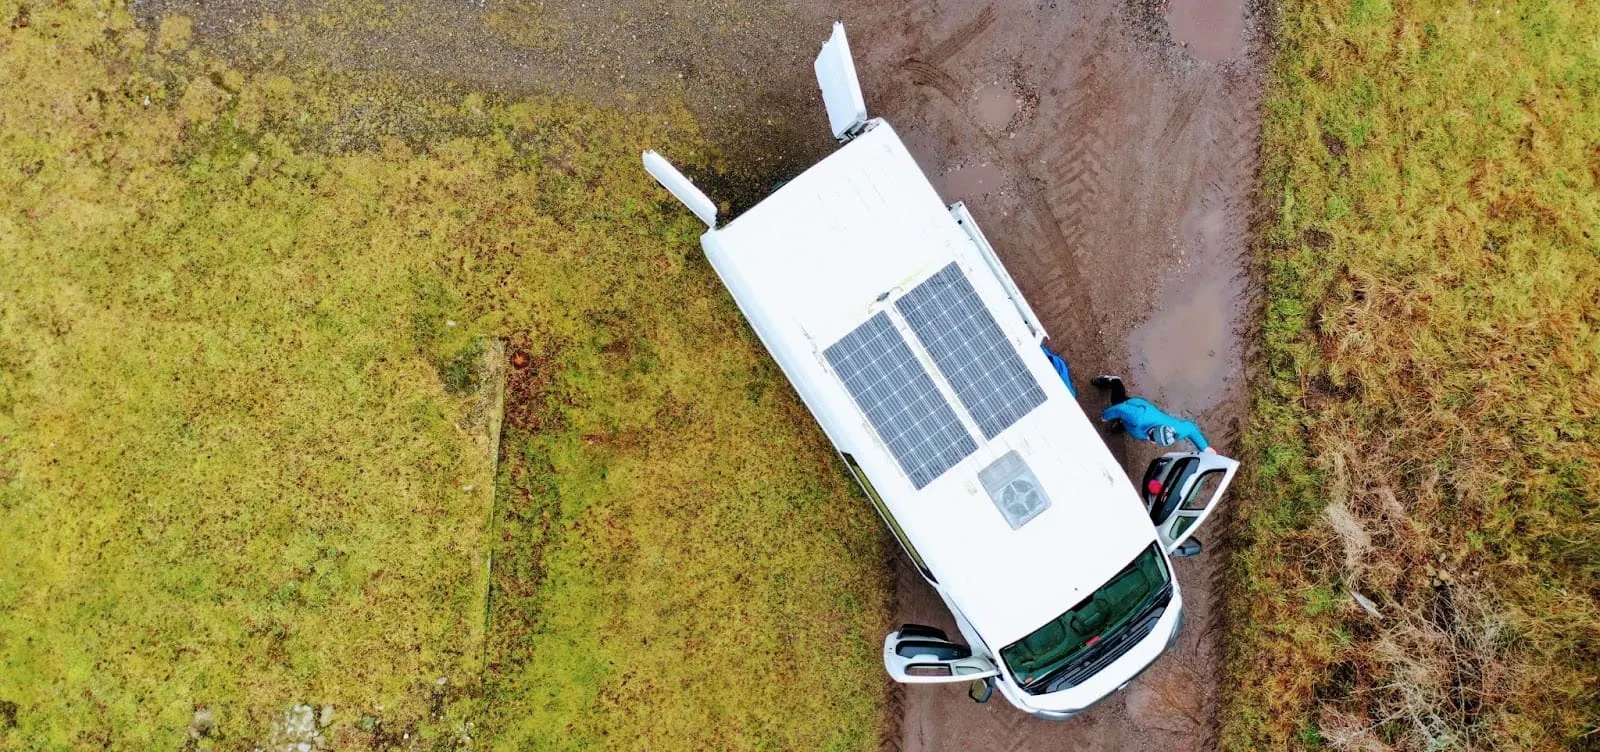
Installing solar panels might sound intimidating, but it's manageable if you break it into steps.
DIY or Professional?
| DIY | Professional | |
|---|---|---|
| Cost | Saves money | More expensive |
| Control | Complete | Less hands-on |
| Speed | Depends on experience | Usually quicker |
| Risk | Mistakes, safety hazards | Comes with a warranty |
| Tools | Need crimpers, strippers | Supplied |
Before You Start — Five Tips
- Plan your layout. Map the solar array and cable path first. Consider both functionality and aesthetics.
- Double-check connections. Use your wiring diagram, especially for polarity and routing.
- Seal all openings. Water damage from a badly sealed roof hole is costly.
- Keep cable runs short. Reduces voltage drop, which matters more on long runs.
- Plan to monitor. If your controller supports it, set up a monitoring app after install.
Step One: Plan Your Setup
Measure your roof space to determine how many panels you can fit. Consider any roof features like fans or vents that might affect placement. Decide whether you'll use rigid or flexible panels based on your roof's shape.
Worth checking whether roof-mounted solar counts as a modification under your insurance policy.
Step Two: Choose Your Mounting Method
| Z-Brackets | Corner Mounts | |
|---|---|---|
| Fixing | Bolted to roof | Glued to roof |
| Drilling | Required | Not required |
| Profile | Close to roof, sleek | Adds height |
| Best for | Rigid panels | Rigid panels, no-drill builds |
Step Three: Mount the Panels
Rigid panels with Z-brackets
- Attach the brackets to the panels
- Position the panel on the roof and mark the holes
- Drill the holes, apply sealant, and bolt the panel in place — with the help of a friend
Rigid panels with corner mounts
- Place the mounts and panels on the roof, mark their positions, and clean the surface
- Apply adhesive and let it dry
- Secure the panels by drilling through the mounts
Flexible panels
- Clean the roof thoroughly
- Apply adhesive to the back of the panels and press into place
- Leave small gaps in the adhesive to allow for air expansion
Step Four: Run the Cables
- Drill a hole in the roof for the cable entry gland
- File the edges and treat with a protective coating
- Use rubber grommets to protect the wires
- A solar entry gland ensures a waterproof seal when running cables into the van
- Seal everything with waterproof sealant to prevent leaks
- Make sure any cable used on the roof is rated for outdoor exposure
Step Five: Connect the Panels to the Charge Controller
Attach MC4 connectors to the wires coming from the solar panels — correctly crimped MC4s keep joins waterproof and secure. Then connect these wires to the charge controller.
Check polarity: positive to positive, negative to negative.
Using an MPPT unit? Our complete guide to MPPT solar charge controllers explains how to get the most efficient charging.
Step Six: Connect the Charge Controller to the Battery
Connect the wires from the charge controller to your leisure battery to store the energy from the panels. Tighten and secure all connections.
Optional: connect the charge controller to a solar isolator so you can switch it on or off. BS7671 regulations state that all solar panels should contain a solar isolator — though this covers private and commercial property, and may not be necessary for campervans with smaller arrays.
Step Seven: Ground Your System
Grounding is essential for safety.
- Connect the charge controller and battery to a common negative busbar
- Ground the busbar to the vehicle chassis
- Bond any exposed metal parts to the van chassis
- In more complex installs, busbars or fuse blocks can simplify connections
Step Eight: Secure and Test
- Double-check all connections and secure any loose cables
- Check the solar charger readings
- Confirm the panels are generating power
- Confirm current flows correctly into the battery
For more detail, see our full guide on how to install campervan solar panels, or our ultimate checklist for DIY campervan electrical systems for the whole build.
Calculating Your Solar Needs
How Many Solar Panels Do You Need?
Start with your daily energy consumption. List all the devices you plan to use and note their power ratings in watts.
Worked example:
html| Appliance | Calculation | Daily use |
|---|---|---|
| LED lights | 5W × 4 hours | 20 Wh |
| Fridge | 60W × 24 hours | 1,440 Wh |
| Phone charging | 10W × 2 hours | 20 Wh |
| Laptop | 50W × 3 hours | 150 Wh |
| Total | 1,630 Wh per day |
1,630 Wh ÷ 5 hours = 326W of solar needed
So you'd want panels adding up to at least 326W — a 360W setup, for instance. Planning to add more devices, or want a buffer for cloudy days? Go for 400W or 500W.
This kind of reality check helps stop undersizing or oversizing the system.
What Does Campervan Solar Cost?
Panel Costs
| Setup | Wattage | Cost | Best for |
|---|---|---|---|
| Basic | 100W–200W | From £160 | Short trips, minimal power |
| Mid-range | 200W–400W | £250+ | Longer trips, more devices |
| High-end | 400W+ | £600+ | Full-time van life |
These are panel costs only. You'll also need a charge controller, inverter, and batteries — or see the complete kit prices above, which bundle the panel, controller and cabling together.
What Else to Budget For
- Batteries — usually the most expensive part of a solar setup. Many buyers choose lithium over AGM for more usable energy and lower weight.
- Inverter — only if you're running standard AC appliances. Price varies with capacity.
- Installation — a few hundred to several thousand pounds if you're not doing it yourself.
- Mounting hardware — some kits include basic brackets, but non-standard roof shapes may need more.
- Monitoring — MPPT controllers include basic monitoring, but a dedicated battery monitor shows charge levels and usage over time.
Depending on component capacity and quality, these additional items will cost a few hundred to several thousand pounds. Our overview of the best campervan electrical systems for different types of travellers shows how costs scale for weekenders, remote workers, and full-timers.
Our breakdown of campervan electrical system costs helps you budget realistically for everything from cables to safety gear.
Are Solar Panels for Campervans Worth It?
The main benefit is freedom. With a well-sized setup, you can stop thinking about hookups and daily power management. Park wherever you like and still have power for your essentials.
Over time, this saves money on campground fees and gives you more travel flexibility.
The upfront cost is significant — panels, batteries, and equipment add up. But the investment usually pays off if you're on the road often or plan to live in your van full-time.
Solar also works especially well combined with other charging options like shore power or alternator charging, rather than relying on panels alone. Our complete electrical systems show how solar, alternator charging, and batteries work together.
Portable vs. Fixed Solar Panels
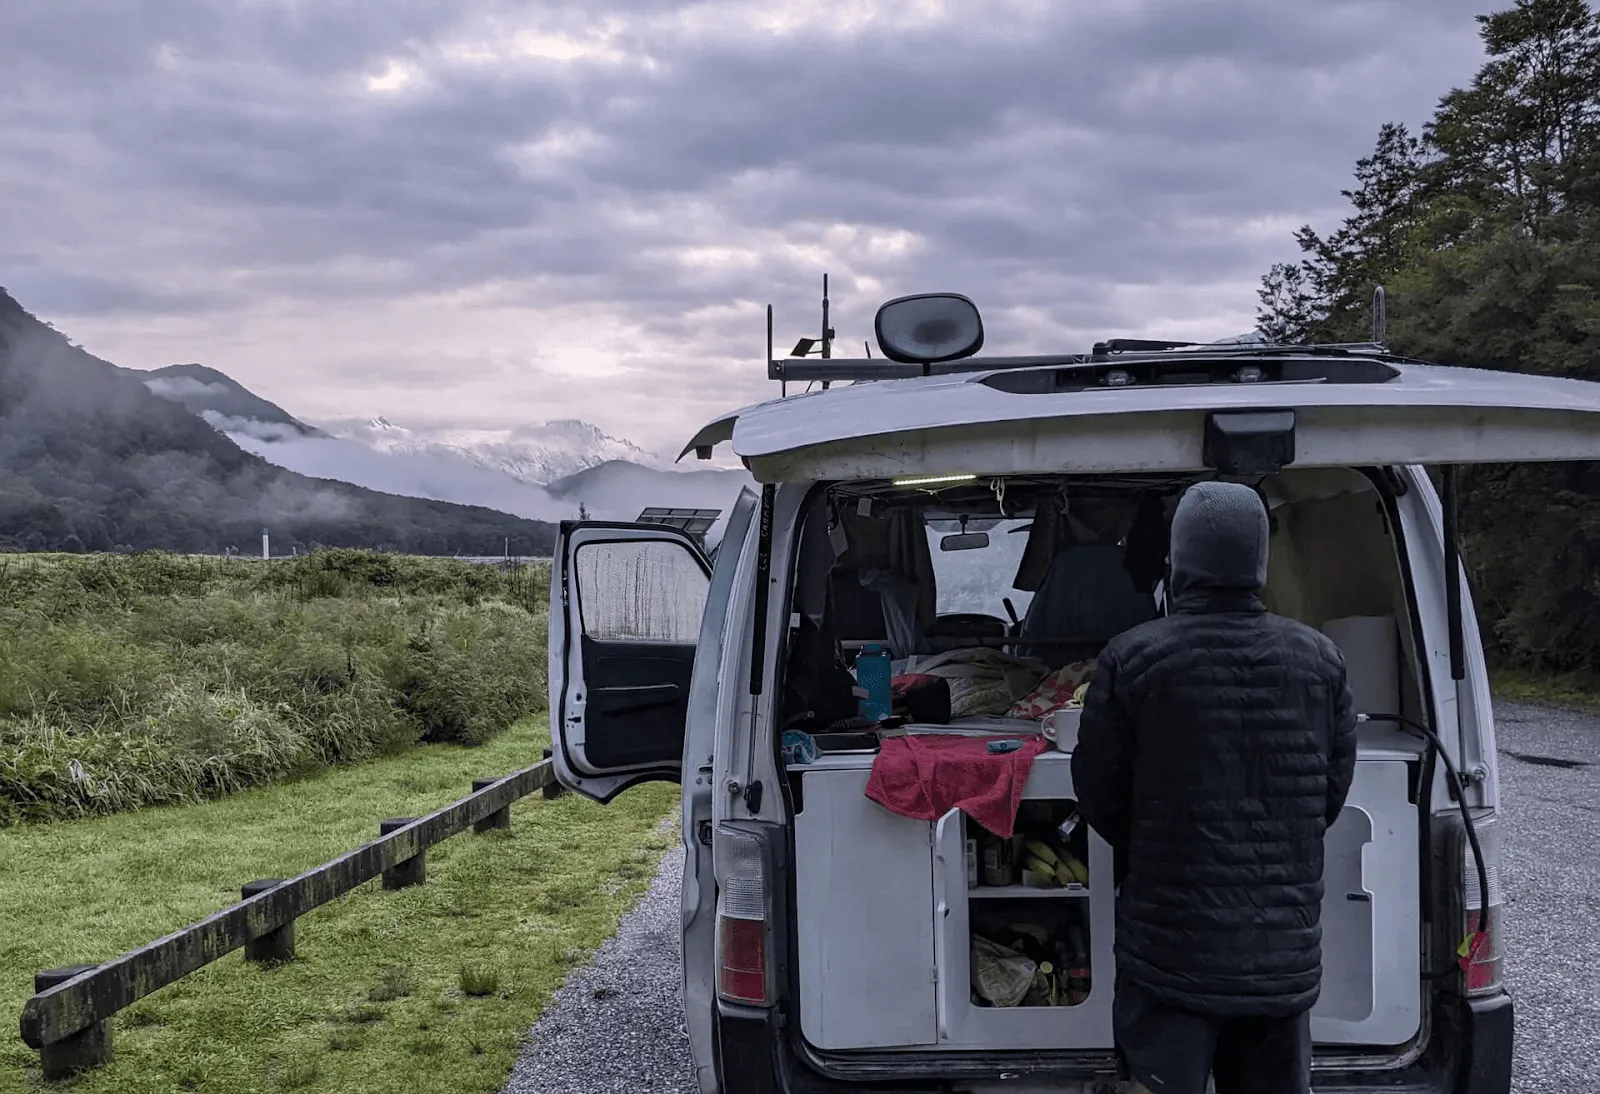
| Fixed | Portable | |
|---|---|---|
| Setup | Permanent, always working | Set up and pack away each move |
| Positioning | Limited by roof angle | Chase the sun |
| Security | Attached to van | Needs secure storage |
| Space | Uses roof space | Uses interior space |
| Convenience | High | Lower |
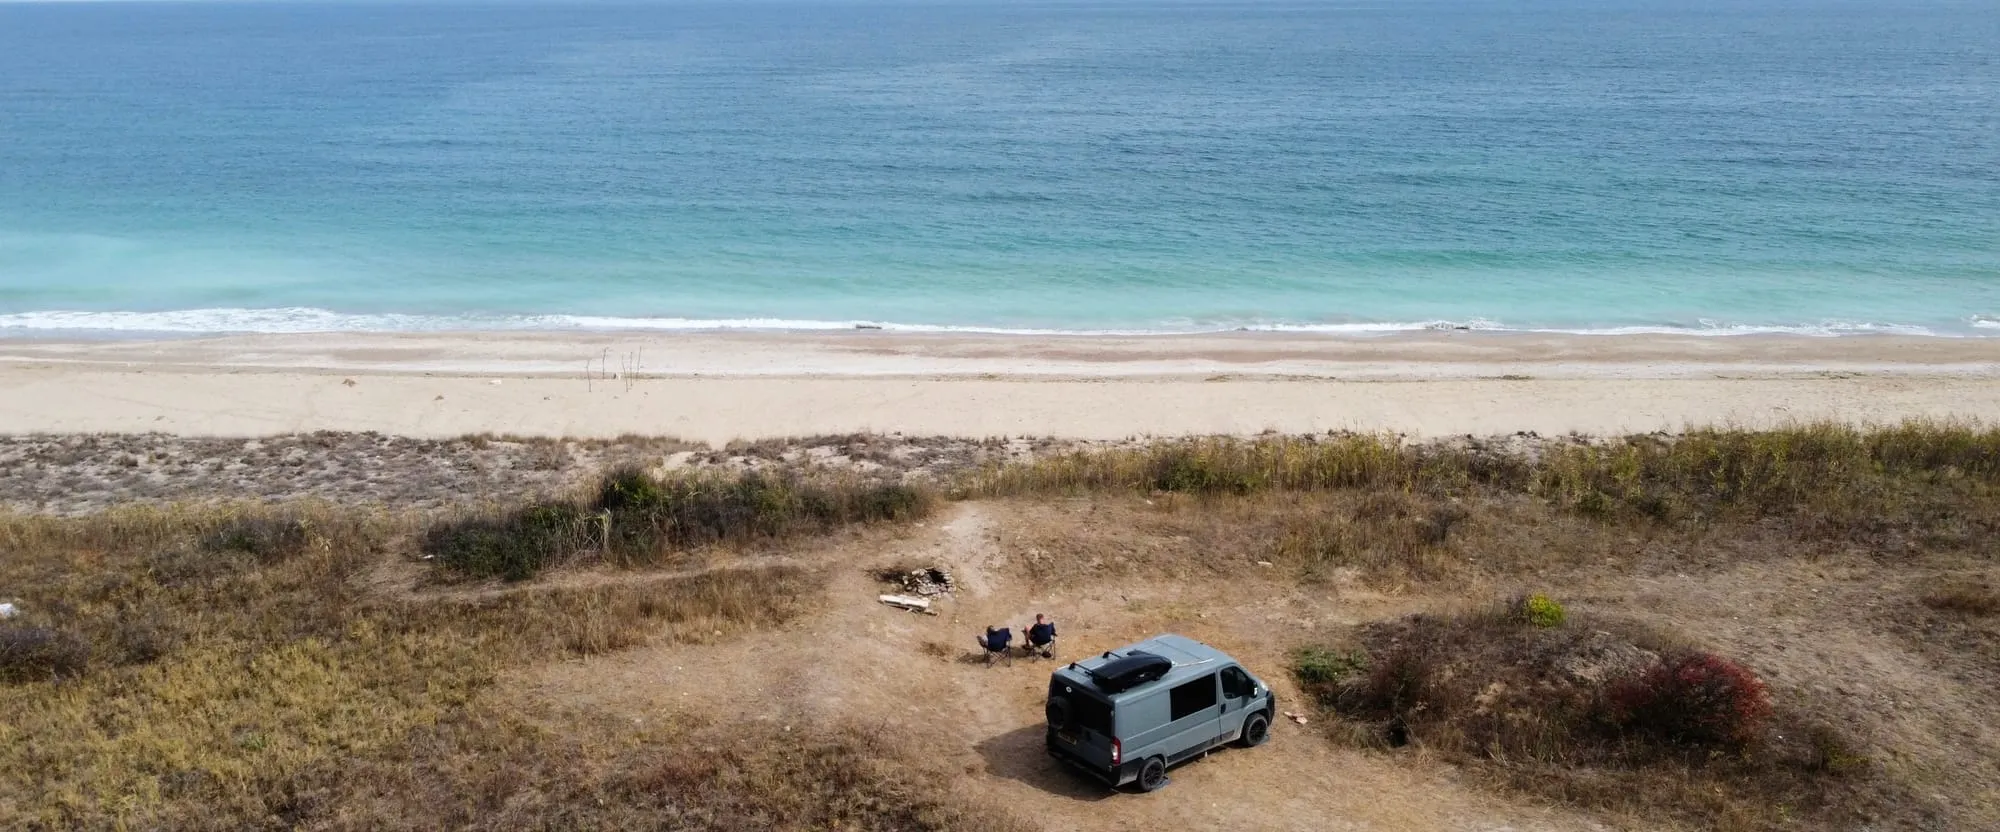
Portable solar panels work better if you want flexibility and plan to stay in one spot for a while, and they can be especially handy for a camper staying put at a campsite. You can position them wherever the sun is strongest — even parked in the shade, you can move the panel into direct sun and, on a sunny day, angle it toward the sun for better output.
The downside? You have to set them up and pack them away every time you move, and store them securely when they're not in use, which eats into space inside your van.
Some vanlifers combine both for the best of both worlds.
Maintenance and Troubleshooting
Keeping Your Panels in Good Shape
| Task | How often | What to look for |
|---|---|---|
| Clean panels | Every few weeks | Dust, dirt, bird droppings blocking sunlight |
| Inspect for damage | Every few months | Cracks, loose connections, hot spots (check bypass diodes) |
| Check wiring | Occasionally | Corrosion, loose connections |
| Monitor output | Ongoing | Unexplained drops in performance |
| Replace parts | As needed | Worn connectors and cables; battery health |
Common Problems and Fixes
Reduced power output
- Likely cause: dirty panels, shading, or poor connections
- Fix: clean panels, remove obstructions, check connections. Panels with built-in bypass diodes limit losses from partial shading, but shaded cells still reduce output — and shading hits series-wired panels harder, because it affects the entire array. If it persists, test the voltage output from the panels.
Battery not charging
- Likely cause: faulty charge controller, poor wiring, or a dead battery
- Fix: use a voltmeter. Measure voltage across the charge controller's input terminals. No voltage means the issue is with the panels — and if one panel is faulty, you may be able to replace just that panel if your setup is modular. If you do get a reading, test the output terminals. No voltage there points to the charge controller. Check and reattach connections; if still nothing, the controller may need replacing.
Inverter problems
- Likely cause: incorrect wiring or a faulty inverter
- Fix: use a voltmeter on the inverter's input terminals. No voltage points to the battery connection — remember, even a "dead" battery should show some voltage. If voltage is present at the input, test the output. Nothing there? Double-check all connections. If everything's secure and you still get no output, the inverter may be faulty — or it could simply be turned off. (Don't worry, we've all been there — make sure it's switched on before assuming the worst!)
Overheating panels
- Likely cause: high temperatures or poor ventilation
- Fix: ensure adequate airflow around the panels. Elevate them slightly for better circulation, especially in hot climates.
Upgrading Your Setup Over Time
Watch out: when adding new solar panels, they need to be the same size as your existing ones. Connect panels of different sizes and the system defaults to the output of the lowest-rated panel. Connect a 115W panel to a 360W panel and you get 230W (115 × 2), not the 475W you'd expect.
Any upgrade should stay within your system's current rating and your controller's limits.
Adding more panels — check your charge controller can handle the extra input. If not, you'll need a higher-capacity controller too. Expanding in parallel may also need thicker cables as current increases.
Upgrading your battery — a larger or more efficient battery, like lithium-ion, provides more storage capacity and better performance over time.
Installing a better inverter — if you start using more AC appliances, a higher-wattage inverter provides the necessary power. Make sure it matches your overall system capacity.
Enhancing monitoring — some MPPT controllers offer Bluetooth connectivity for real-time monitoring via your smartphone.
Solar in Different Climates

| Climate | Key consideration | What to prioritise |
|---|---|---|
| Sunny (Southern Europe, Southern US) | Abundant sunshine lets you maximise output | Larger setups, monocrystalline panels |
| Cloudy (UK, Ireland, N. Europe) | Frequent overcast skies | High efficiency in low light — Victron monocrystalline panels excel here |
| Cold (Scandinavia, Northern US) | Cold affects battery performance | Batteries rated for low temperatures; panels resistant to snow and ice |
| Hot (Southern US, Mediterranean) | Panels overheat and lose efficiency | Good ventilation and airflow around the array |
Best Solar Panels for Campervans
Your choice comes down to budget, space, and how you plan to use it.
Budget-Friendly
Victron 90W Rigid Solar Panel — a great starting point if you need basic solar power for small devices or lights. Efficient, easy to install, and comes with a 25-year warranty. Durable enough to be a smart investment for budget-conscious travellers.
Mid-Range
Victron 115W Rigid Solar Panel — excellent value for a bit more power. Ideal for weekend trips and shorter adventures where you need to power more devices. Works well in all weather and installs easily with z-brackets or corner mounts.
Victron 140W Rigid Solar Panel — a step up if you need more energy for longer trips. Still reasonably priced, with enough power to run multiple devices, efficient charging in various conditions, and a 25-year warranty.
High-End
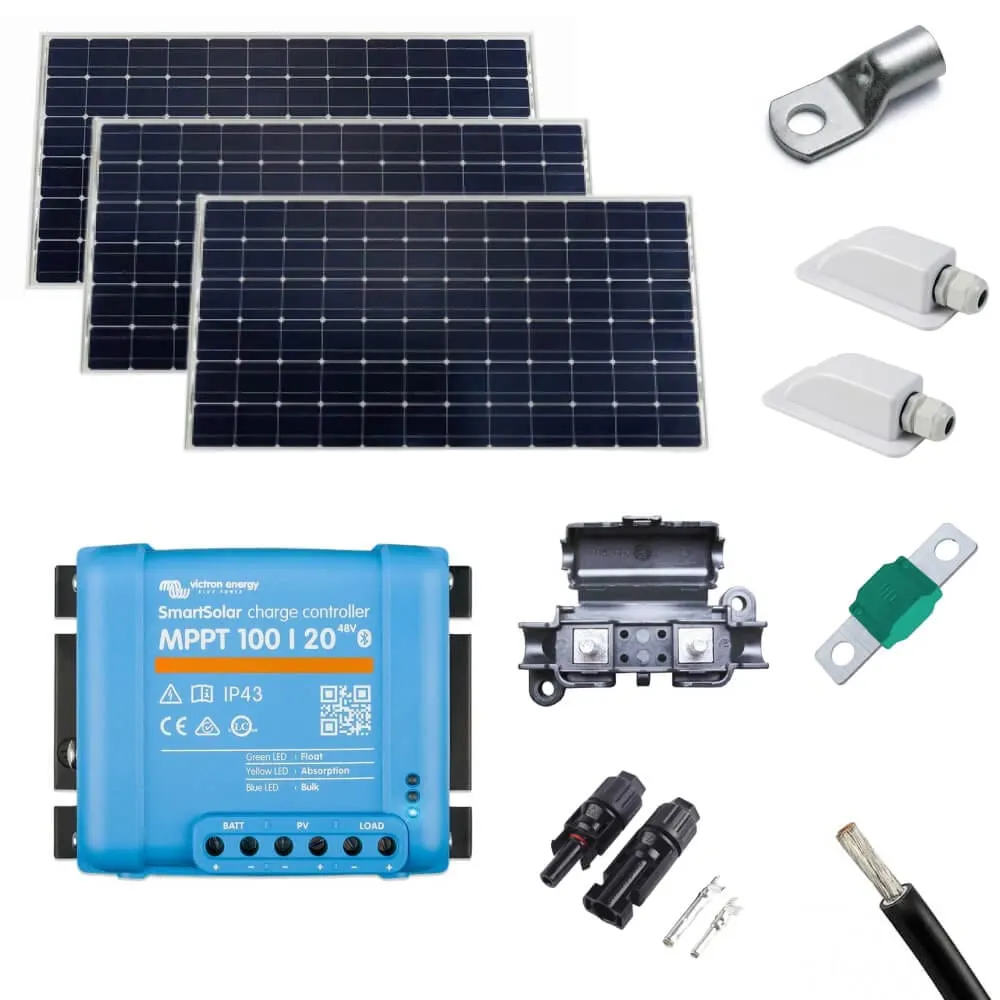
Victron 305W Rigid Solar Panel — substantial power for those living on the road full-time or running more demanding appliances. Larger arrays like this often pair best with lithium batteries for faster charging and deeper cycling. Efficient in all conditions and built to last.
Victron 360W Rigid Solar Panel — ideal for extended off-grid living. Generates ample power to keep your devices running for long periods, and handles high and low temperatures efficiently; buyers comparing other high performance options may also come across the Renogy N-Type 200W panel, rated at 25% cell efficiency.
Best for Limited Roof Space
100W Flexible Solar Panel — lightweight, thin, and easy to install on flat or slightly curved roofs. Perfect for pop-top roofs or a sleek profile. More expensive than rigid panels, but the flexibility and ease of installation make it worth the cost.
120W Flexible Solar Panel — balances power and flexibility. Enough power for longer trips, and installs on various roof types. A reliable mid-range option that adapts to different setups.
Best for Heavy Power Users
Victron 215W Rigid Solar Panel — a strong contender if you're running multiple devices. Delivers efficient charging in all weather and is built to last, and victron's panels work especially well as part of an integrated setup with Victron charge controllers and batteries for long-term reliability. Ideal if you need consistent, high-output power and are planning extensive travels.
Whether you're a weekend warrior or a full-time traveller, Vunked has a solar panel to power your vanlife adventures, and our campsite hook-up campervan electrical system is ideal if you mostly stay on sites but still want solar on the roof.
Ready to build your setup? Browse our complete campervan electrical systems, or use our campervan electrics systems builder if you'd like a tailored kit and wiring diagram, or get in touch via our contact and free design service if you'd like help planning a custom system.
Power Your Campervan Off-Grid With Vunked
Solar panels let you enjoy the freedom of off-grid living by harnessing sunlight to power your devices and appliances. With the proper setup, you can stay off-grid longer and explore remote locations without worrying about energy.
FAQs
How do I fit a solar panel to a motorhome?
Decide on your mounting method first — z-brackets or adhesive mounts. Then install the panel, run the cables to your charge controller, and connect it to your battery system. Ensure everything is securely fastened and weatherproofed.
How many watts does a solar panel need for a campervan?
It depends on your energy consumption and how long you want to stay off-grid. Generally, 200W to 400W is sufficient for most campervans, covering basic needs like lighting, charging devices, and running a small fridge.
Who fits solar panels to motorhomes?
Professional auto electricians specialising in motorhome or campervan conversions. Alternatively, if you're comfortable with DIY projects, you can install them yourself using a detailed guide and proper tools.
How much do solar panels cost for a campervan?
A panel on its own starts around £160 for 100W. A complete kit — panel, MPPT controller and cabling — starts at roughly £300 for 140W, rising past £600 for 360W and above. Add a leisure battery and an inverter and a full system typically lands between £1,000 and £2,000, depending on battery capacity
What is the best solar panel for a campervan in the UK?
The best balances efficiency, durability, and cost. Monocrystalline panels are typically more efficient and work well in the UK's varied weather conditions, making them a top choice for vanlifers.
Is a 100W solar panel enough for a campervan?
Enough for minimal energy needs like charging small devices and running a few LED lights. It may not suffice for larger demands like a fridge or heating system, especially for extended periods off-grid.
How much solar power do I need to run a fridge in my campervan?
At least 200W to 300W, depending on the fridge's efficiency and your location's sunlight availability. That should keep the fridge running constantly.
Can I add more solar panels to my existing setup?
Yes — if your charge controller and battery bank can handle the additional input, and the new panels match the size of your existing ones. Ensure the total wattage doesn't exceed your system's capacity.
Are solar panel kits worth it?
Yes, if you spend time off-grid. They provide a reliable, renewable energy source, reducing your need for campsite hookups. Over time they save money by reducing fuel and generator use, and they offer the freedom to camp in remote locations without sacrificing comfort. If you regularly stay away from mains power, they're usually a worthwhile upgrade.