Build your own campervan electrical system
Are you looking to build your own campervan electrical kit? Here at Vunked, we've developed a remarkable new tool - our campervan electrical system builder - which takes the guesswork out of planning your van electrics by helping you answer a few quick questions about your van build and creating the exact system matched to your energy needs and power needs. Many builders and DIY builders use this kind of approach because it simplifies early system design.
Based on our experience of campervan conversions and off-grid living and working, we've worked out the best way to calculate exactly what you need from your electrical system, and our introduction to campervan electrics explains the core concepts if you’re starting from scratch.
This tool is free to use and provides you with our insight on exactly how long you'll be able to stay off-grid. If you're interested in our calculation method, stay tuned to our emails to find out more in the future.
What Does the Campervan Electrics Builder Do?
Our build your own campervan electrical system puts you in the driver's seat (pardon the pun) and lets you experiment with different options for your van conversion. It considers what appliances you want to run while off-grid, what type of batteries you want, and how you intend to charge them.
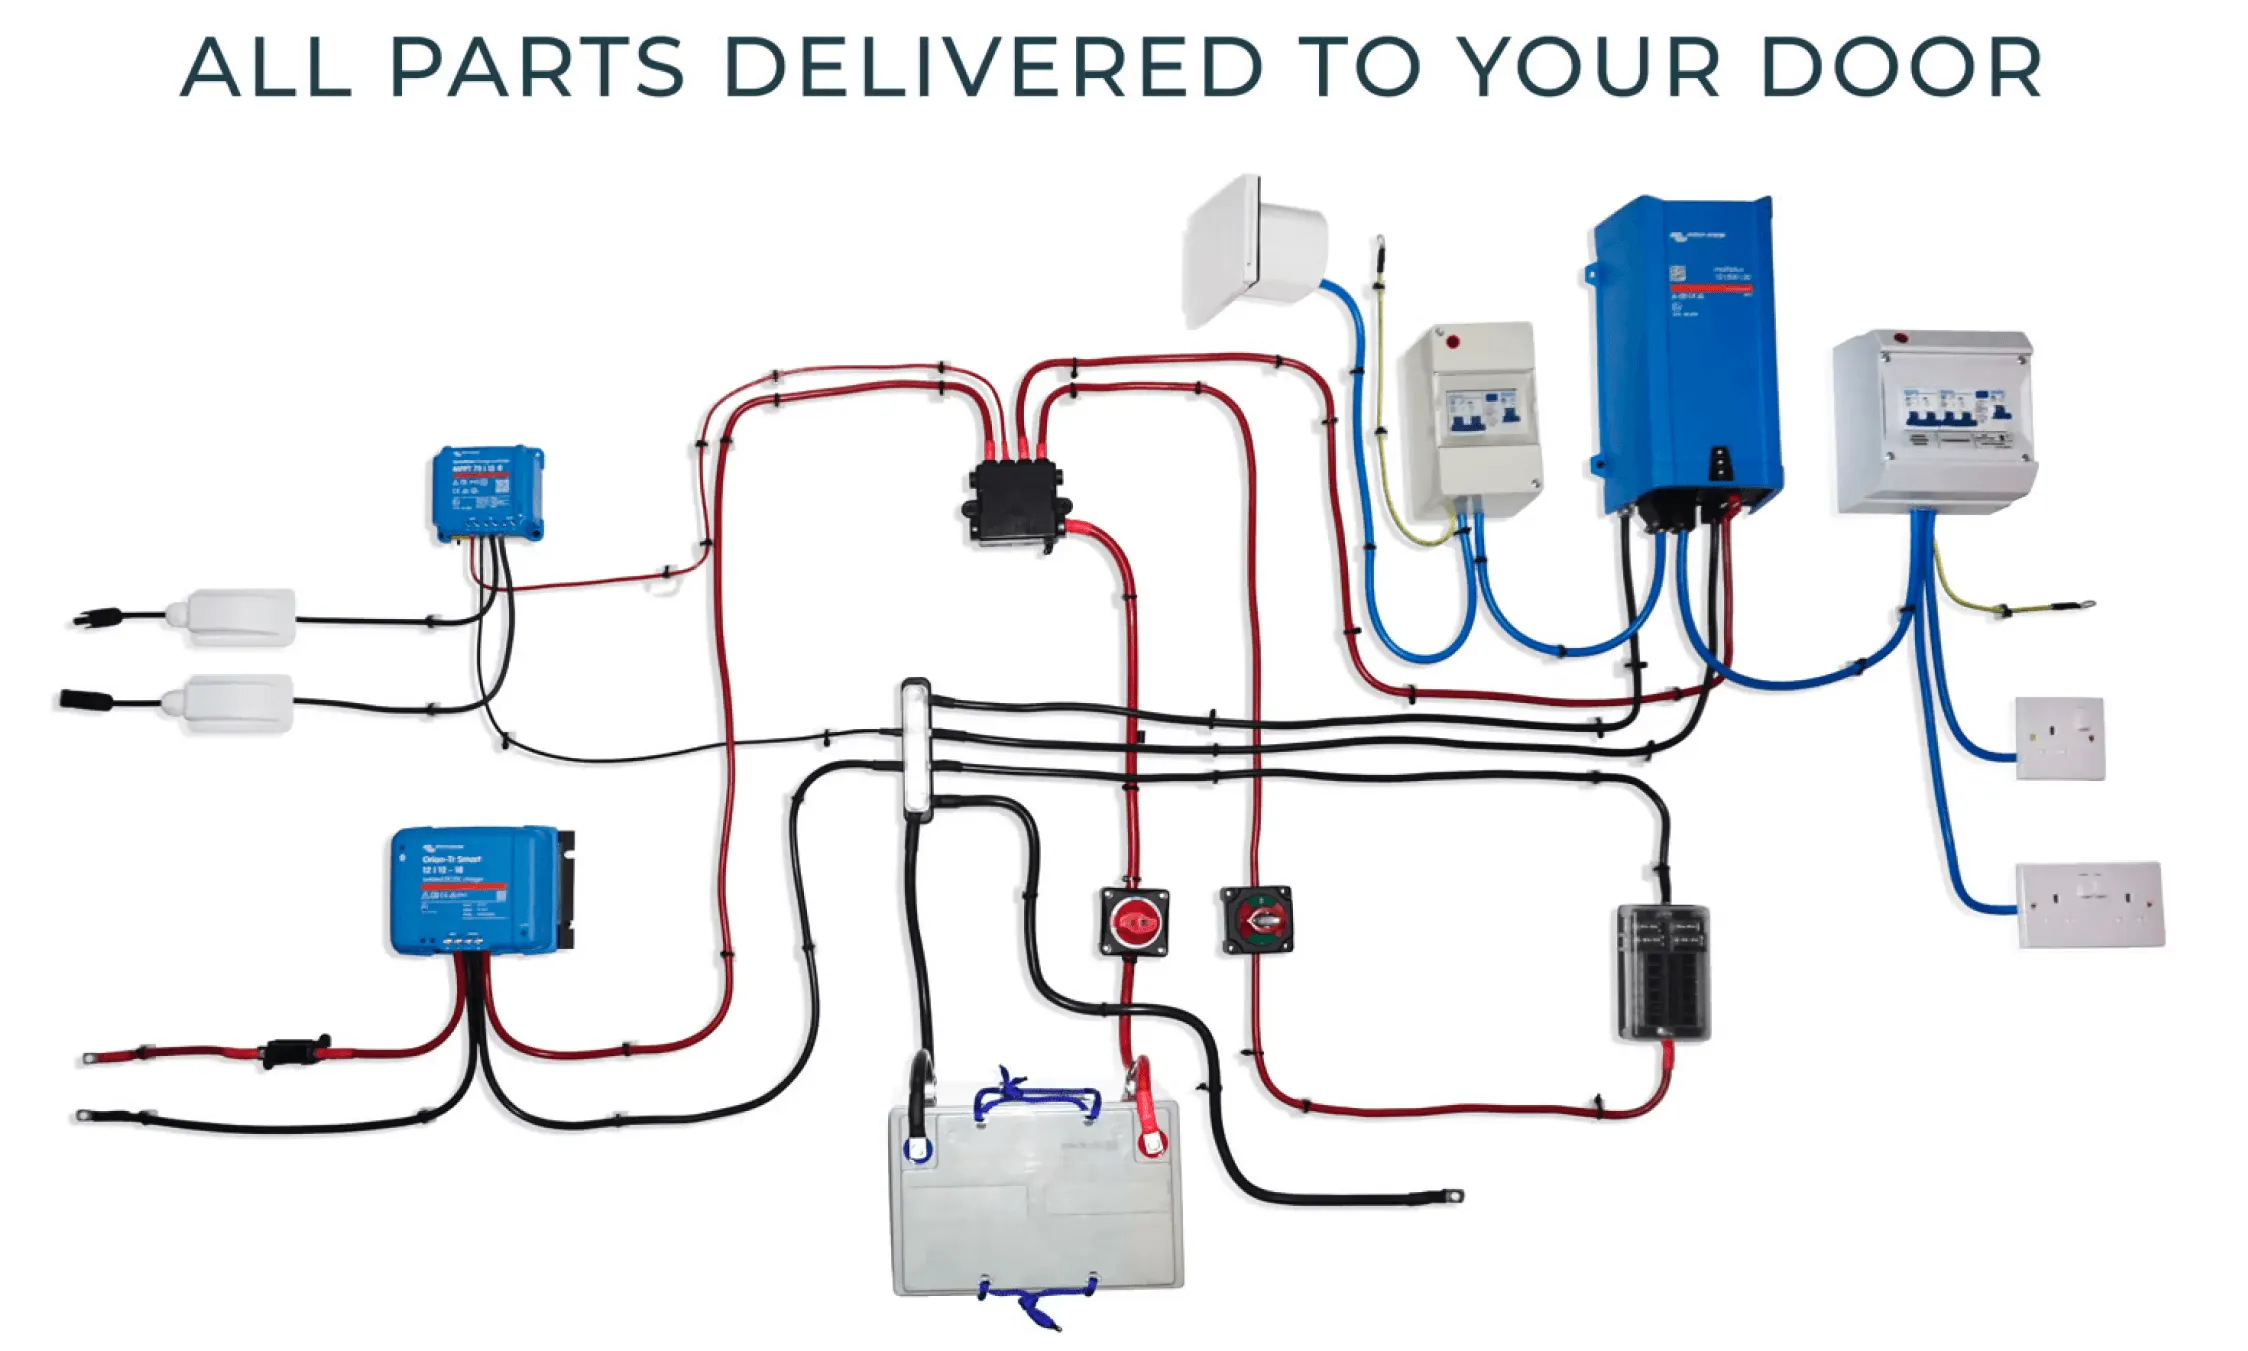
Once you've given it this information, it calculates how long you can stay off-grid before you run out of power. It even gives you a free wiring diagram and a custom wiring diagram tailored to your chosen components, along with a quote for a complete kit covering all the components needed for your installation, including battery cables and other wiring essentials; getting the system in one delivery can also save money compared with sourcing parts separately.
The best part of our build your own campervan electrical system is that you can change appliances, batteries and charging systems and instantly see how this will affect how long you can stay off-grid. So, play around with this if you're comparing electrical kits or planning a full system before buying the right kit.
What Information Do I need?
Before you start, you'll have to think about what you want from your van conversion. This can be tricky if this is your first foray into van life, and using a structured DIY campervan electrical checklist can help you cover all the main decisions, but some things to think about are:
- Where do you want to go?
- Do you want to work or just play in your van?
- Do you plan on visiting campsites or spending most of your time off-grid?
- Are you building for occasional trips or full time off grid use?
- Do you intend to drive long distances on each trip?
- What battery size and solar capacity will you need for the way you travel?
How To Use The Campervan Electrics Builder?
We'll explain what you need to do at each stage below. Our electrical system builder lets you compare different options for charging your batteries, weigh up a solar kit or other subsystem kits before deciding what Vunked should supply, and see how they will affect your ability to stay off-grid. A top tip is to remember what you intend to use your van for.
Designing a high-spec system to stay off-grid indefinitely is all good, but if you plan on using your van for a week or weekends, this should dictate your system capabilities, and our guide to the best campervan electrical systems for different lifestyles dives into examples for common use cases.
For an easier route, you can use campervan electrical kits as a complete electrics kit that simplifies the process and ensures all components are compatible; many kits on the market are incomplete, so choosing a campervan wiring kit with all safety and charging parts matters, and our range of campervan electrics systems and conversion kits is designed specifically to avoid those common pitfalls.
The six stages of the calculator to build your own campervan kit are:
- Off Grid Appliances
- Battery and Battery Monitoring
- Solar Charging
- Battery-to-Battery Charging
- 230V Capabilities
- 12V Fuse Box
Stage 1: Off-Grid Appliances
Please accept cookies to access this content
Start by telling us what appliances you'd like to use on your adventures once you're off-grid. For example, if you only use your hairdryer when you're hooked up at a campsite, then we don't need to account for it here. However, if you're unsure about what to include, it's better to err on the safe side - it's better to have too much power rather than not enough!
We split appliances into 12V and 230V - remember that 12V is cheaper and easier to install, so we recommend running as much as possible in 12V. Our overview of campervan 12V wiring diagrams shows how these low-voltage circuits are typically put together. If you want to power 230V appliances while off-grid, you'll need an inverter which adds complexity and cost to your electrical system.
Stage 2: Battery and Battery Monitoring
Please accept cookies to access this content
Once done, you'll be asked to choose your battery capacity and technology. Check out our blog post if you are unsure of the difference between AGM and lithium batteries. Compared with AGM, a lithium battery gives higher usable capacity, more usable capacity in daily use, a longer lifespan, and faster charging. AGM batteries are common in budget kits, while a mid-range setup may use around a 200Ah battery bank built around fogstar batteries. We recommend playing around with the battery capacity as you add in charging systems - you'll be able to see exactly how your battery capacity will affect how long you can stay off-grid!
On this page, you have the option to add battery monitoring. There's a primary voltmeter option in the Victron BMS SmartShunt or an entire system monitoring and control tool in the Victron Cerbo GX, which can be supplied with a touchscreen or without, helping you check battery status and view real time data, and our dedicated Victron campervan electrical systems page shows how these components work together in complete kits.
Stage 3: Solar Charging
Please accept cookies to access this content
Solar panels are a favourite of van lifers everywhere. In this section, you can choose the total capacity of your panels to harness renewable energy, support off-grid living, and reduce reliance on fossil fuels.
Since the amount of sunshine significantly affects your panels' effectiveness, we provide both summer and winter off-grid estimates. Solar can also lower electricity generation costs, and compared with petrol generators it needs less maintenance, runs quietly, and has no exhaust emissions. Build your own campervan kit with as much renewable energy as you can fit on your roof!
We supply solar arrays with Z-brackets for mounting by default, but this can be changed to adhesive corner mounts. This part of the kit typically includes solar panels and charge controllers, and a solar charge controller manages solar input and regulates battery charging.
Why not check out our deep dive on solar panels if you're unsure about any of this?
Top Tip
When choosing what size solar panels you want, you'll notice the physical dimensions are shown.
It's worth making sure whatever size solar array you are considering can fit on the roof of your van!
Stage 4: Battery-to-Battery Charging
Please accept cookies to access this content
There are two options for a DC-DC charger, also referred to here as a DC charger, with 18A and 30A choices, and it protects the leisure battery by regulating charge current from the alternator. You'll also be able to tell us how long you intend to spend driving each day to keep your batteries topped up.
This is a great charging option if you're constantly moving on a road trip. However, if you intend to drive somewhere on day one and stay there for two weeks, then DC-DC won't be as effective.
We recommend playing around with the hours you drive daily to see how it affects your ability to stay off-grid, especially if you’re leaning towards a campsite hook up campervan electrical system that combines alternator charging with shore power.
If you want to learn more about battery-to-battery charging, read How To Charge A Leisure Battery While Driving?
Stage 5: 230V Capabilities
Please accept cookies to access this content
Determining what 230V capabilities you want in your campervan involves two intermediate steps:
- Choosing your '230V System'
- Sizing the '230V system' you have selected
Stage 5.1: Choose Your 230V System
First select between the following options for your 230V systems - No 230V, Battery Charger, Inverter or Multiplus. This lets you configure the exact setup around shore power, inverter use, or a MultiPlus inverter/charger. We will explain what those are:
No 230V - This is fairly explanatory, you will have no components to run 230V appliances from. Selected this if you only have 12V appliances in your van
Battery Charger - Also known as a Shore Hook Up, this will let you charge your leisure battery when connected to mains. It will also let you use 230V appliances when connected to shore. However, it will not let you use 230V appliances off-grid.
Inverter - An inverter converts 12V power in your leisure battery into 230V power, so you can use your 230V appliances whenever you like. The Inverter or the Multiplus is required for using 230V appliances off-grid. However, you cannot charge your leisure batteries at a camp site or plug directly into shore power with just an inverter.
Inverter/Charger - The MultiPlus inverter/charger is a snazzy bit of kit from Victron Energy, using the same Victron components already used elsewhere in this section. It works as both a Battery Charger and Inverter in one device. The Multiplus will charge your leisure battery and power your 230V appliances from shore power when connected at a campsite. When you disconnect from shore power, the Multiplus will automatically switch to act as an inverter, drawing power from your leisure battery.
Build your own campervan kit or opt for a pre-designed Weekender campervan electrical system to run what appliances you want when you want.
Stage 5.2: Choose Your 230V System Size
Once you have selected your 230V system, it is time to size it. If you have chosen the Battery Charger, you will be sizing based on how fast you want to charge your leisure battery
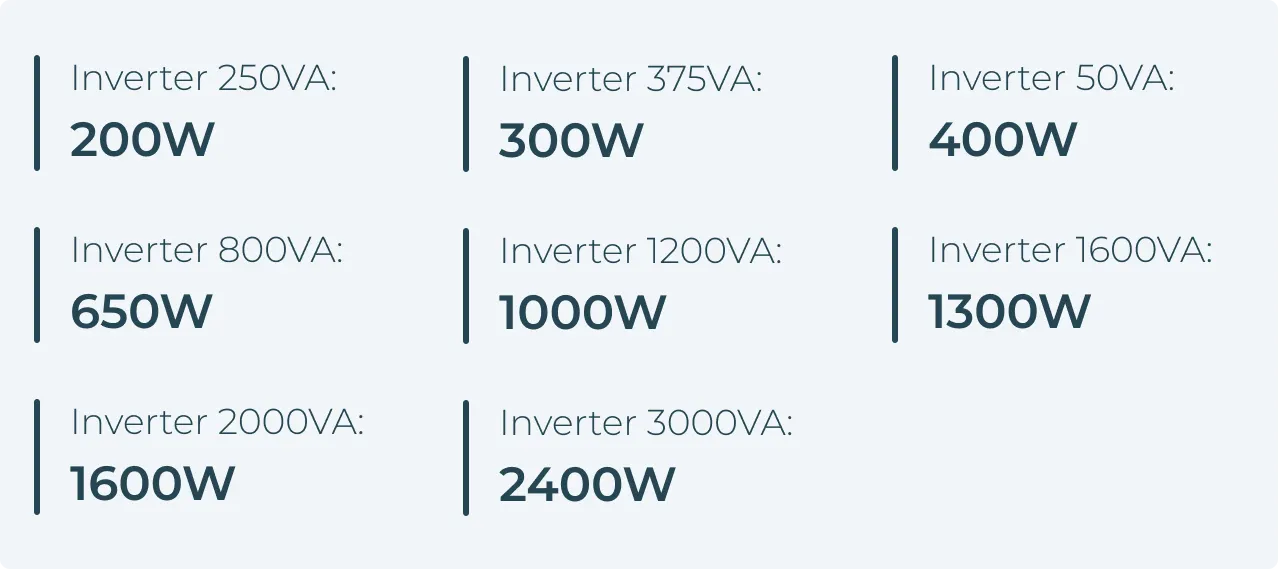
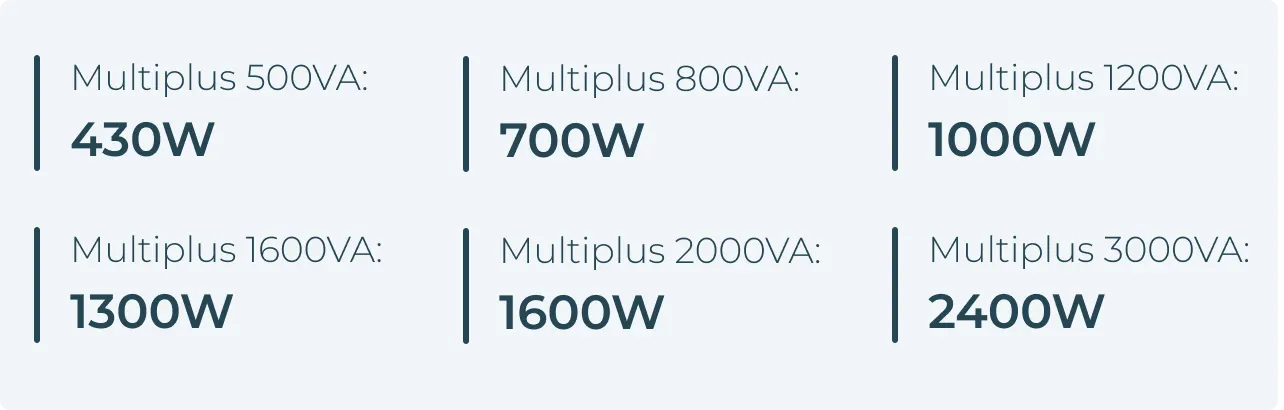
Sizing for the Inverter or Multiplus is based on the wattage of your 230V appliances. You will need to select an Inverter or Multiplus which can handle the load. See below for the rated wattage of the Multiplus and Inverter at 25 degrees celsius.
Stage 6: 12V
Please accept cookies to access this content
Finally, we come to the 12V appliances you ticked off earlier. To connect these appliances to your system, you'll need a fuse box, an isolation switch, fuse holders and the right cable sizes for each run. This section lets you choose whether or not you want this to be supplied with your system, and installation should follow the specified fuse ratings, with high-current parts using mega fuses where required.
Get Your Campervan Electrical Wiring Diagram
Please accept cookies to access this content
Congratulations, you have built your very own bespoke campervan electrical system!
Do you want to see your final wiring diagram? Just enter your contact details and push "View Wiring Diagram" to see how your system would be put together; it’s incredibly helpful for DIY installation, with labelled components that make the layout easier to follow.
Why Do We Ask For Contact Details?
By giving us your contact details we can send this wiring diagram directly to your inbox so you can view it as many times as you like. Furthermore, we will also send you a System Summary, which summarises all the parts, your off-grid times and a cost breakdown of your system. See an example below.
Example: System Summary
Can I Get My Bespoke Campervan Electrical System Delivered to Me?
The short answer is yes!
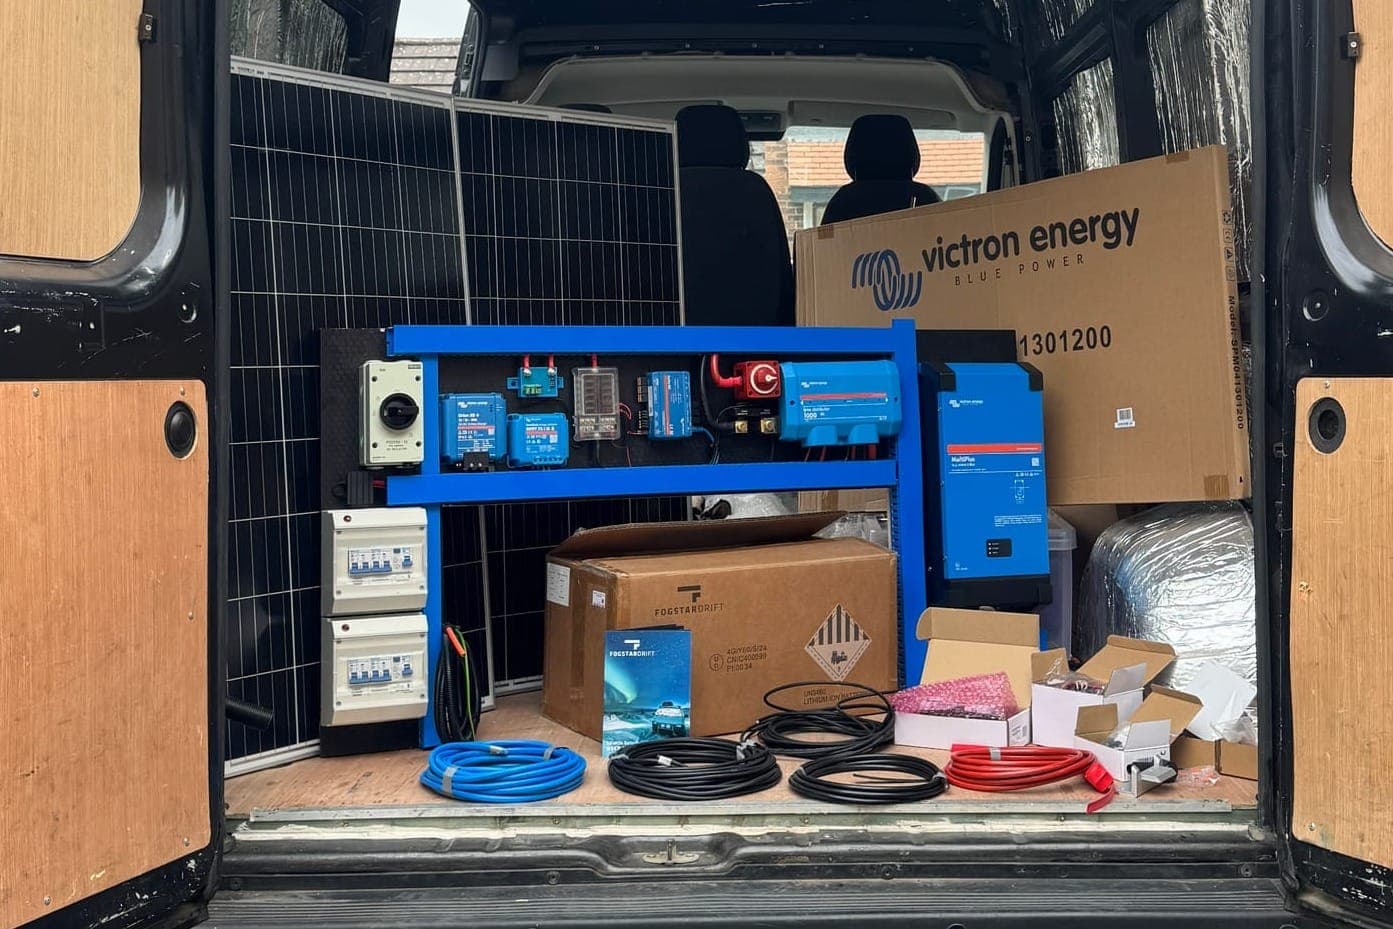
You can get this full campervan electrical system delivered directly to your door as a complete package. The kit includes batteries, inverters, wiring, and the rest of the required parts, down to the last wires, fuses and lugs, with Victron Energy components used where specified.
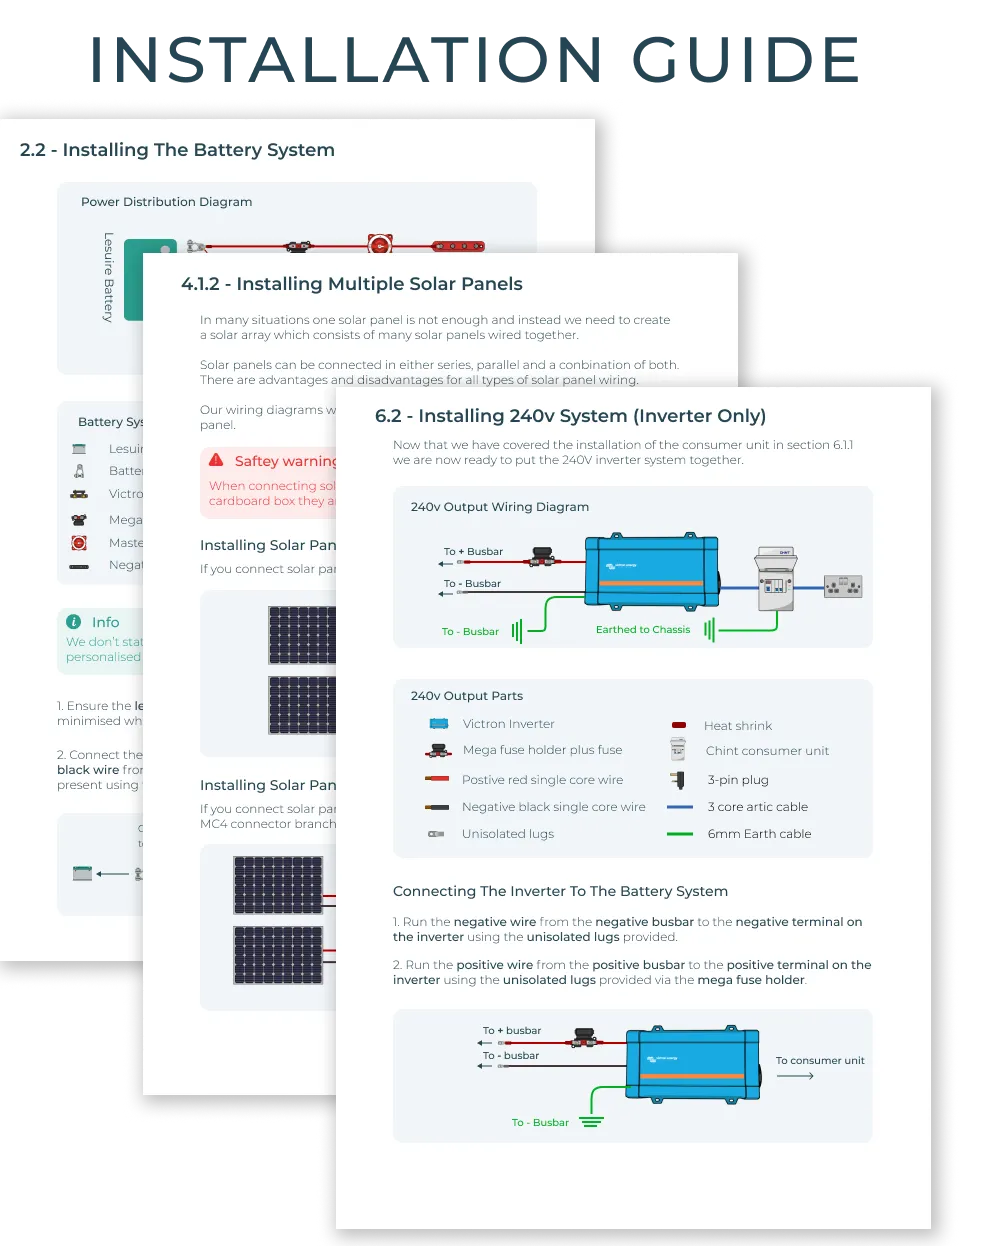
In addition to getting all the necessary parts, you will also get a step-by-step installation guide with detailed instructions to support DIY builders and DIY installation so you can install your system confidently. We can provide support during installation, and you can also book a free campervan electric consultation if you’d like one-to-one help with design or installation, though some customers may still prefer professional installation for extra peace of mind.
We sell kits for different campervan setups, and our contact us page for campervan electrical design help is the best place to reach out if you’re not sure which route to take.
Example: All The Parts for Installation & Installation Guide