Inverters In Campervans
Suppose you plan to use 230V appliances while off-grid. First, you must install an inverter. Unfortunately, wiring a campervan Inverter can be difficult. Learn here how it's done.
An Inverter converts your 12V battery supply into 230V, allowing you to power household appliances. This process is the same whether you need 60W to power your laptop charger or 1000W to power your microwave. If you are unsure what size inverter you need, read our blog on
what campervan size I need.We'll walk through the steps to install and wire an inverter in your campervan so that you can enjoy your 230V appliances while off-grid. What we will cover:
- What You'll Need
- Installing The Inverter Input to the Battery System
- Installing the Inverter Output to the Consumer Unit
- Campervan Inverter Final Check
In this example, we will show you how to install a 375W Victron Phenix Inverter. Most inverters will follow the same process, but always check the user manual for the same wire and fuse sizes required for installation.
We also recommend that a professional check all installations at a minimum.
Safety Warning
Working with 240V electricity is dangerous and can kill. We always recommend getting a professional to carry out and sign off the electrical installation before use.
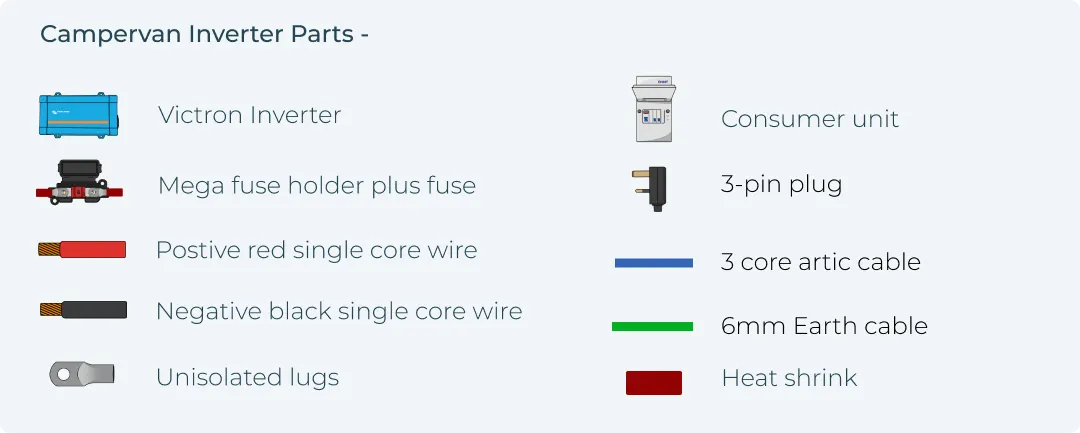
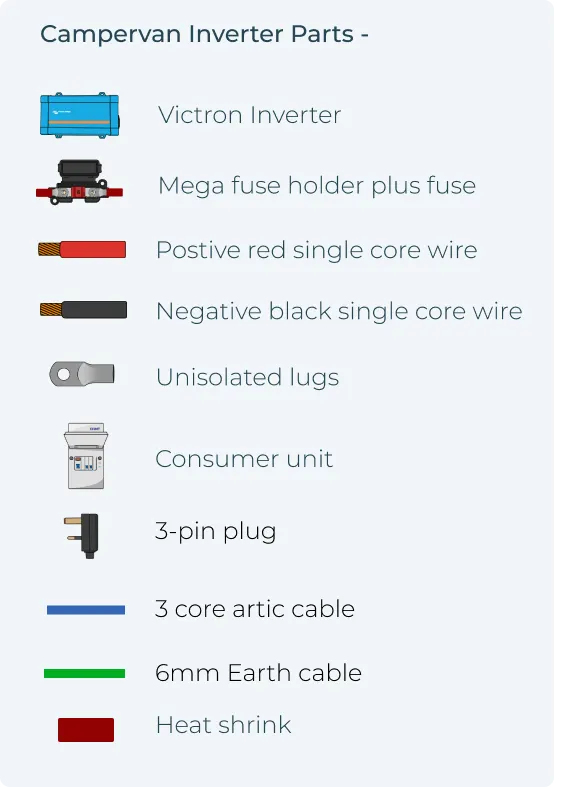
What You'll Need
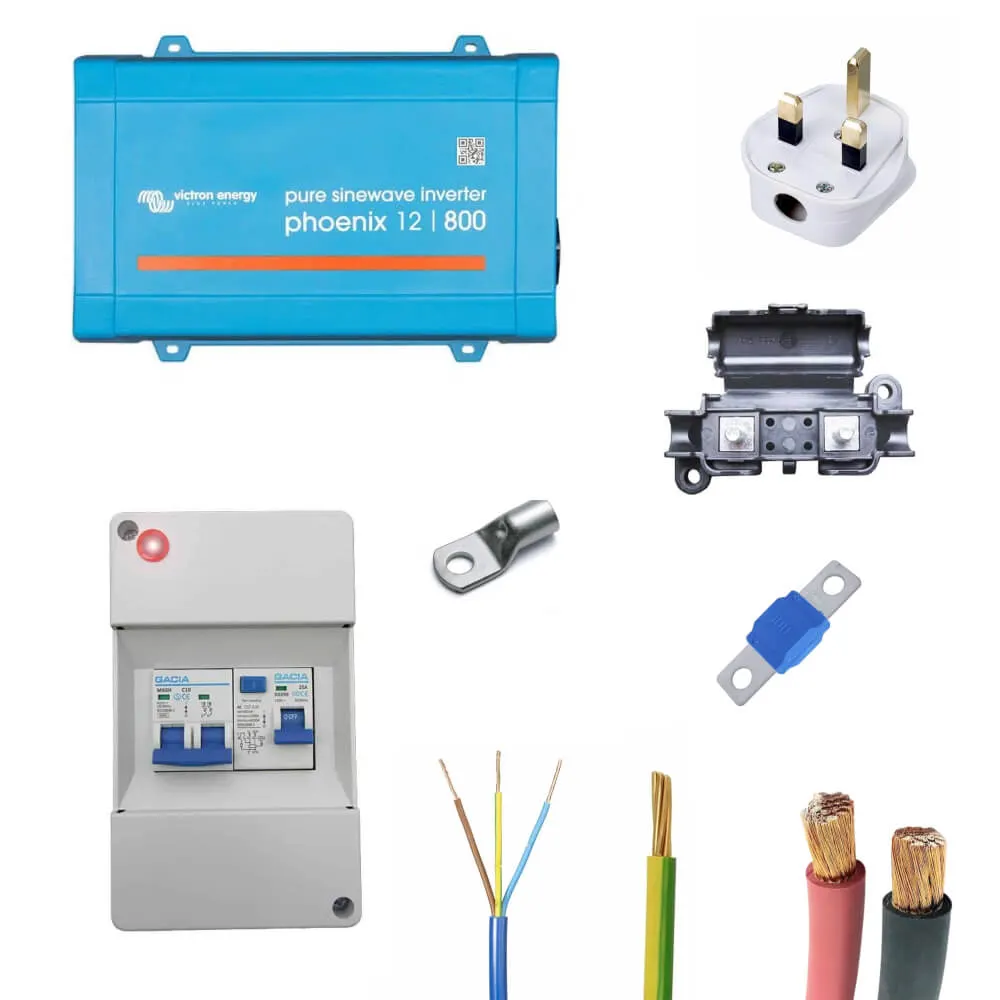
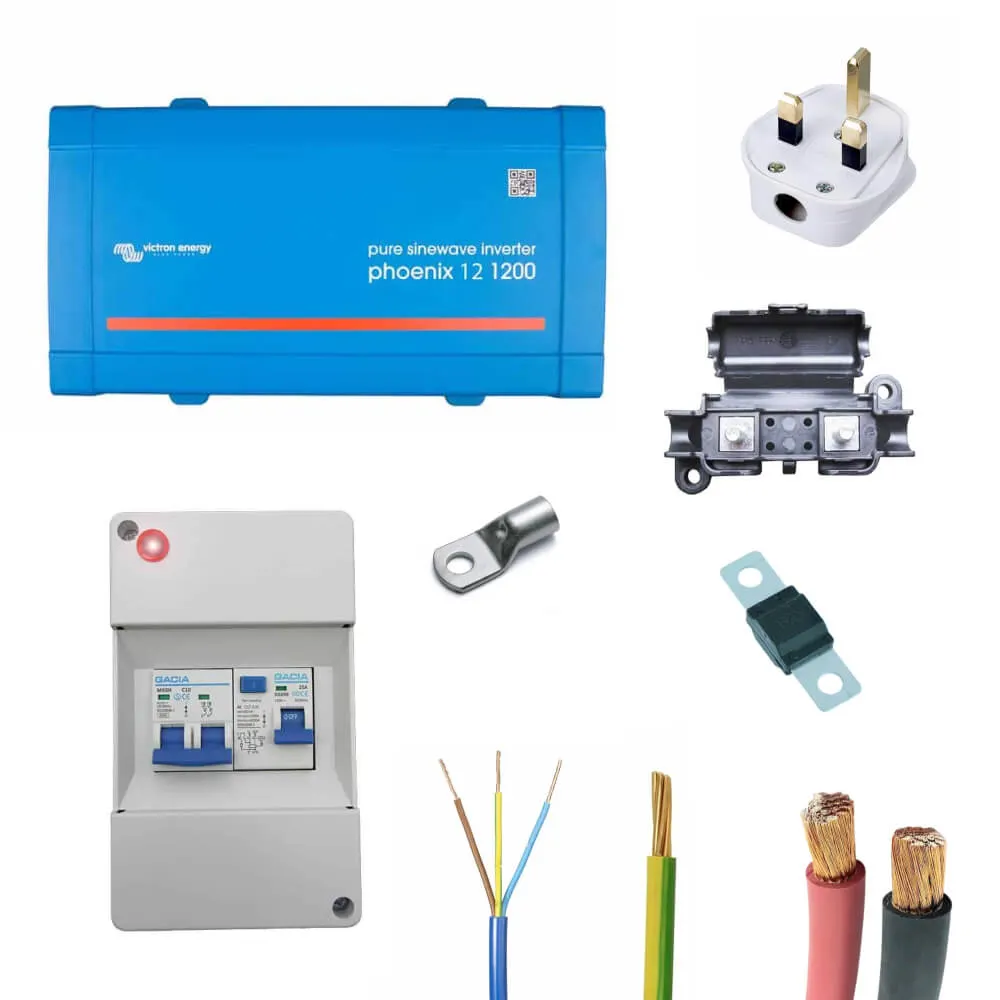
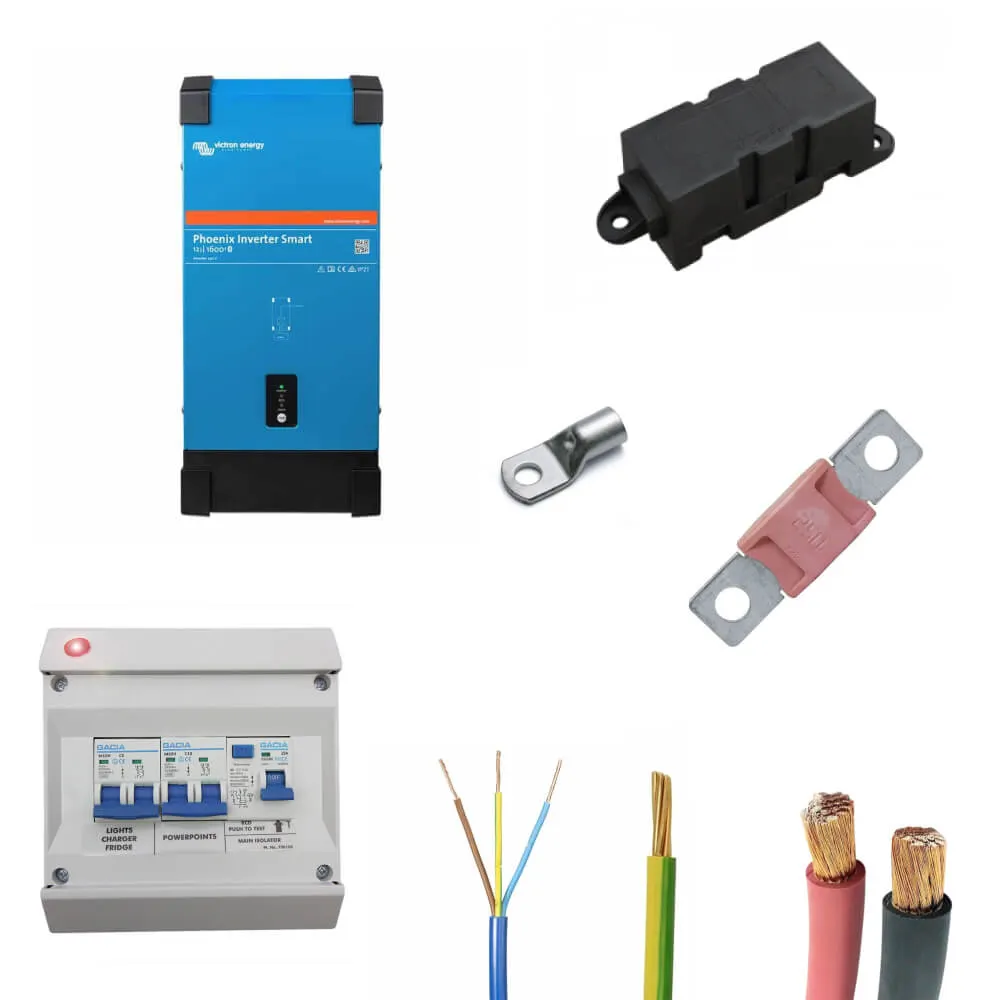
To Install an inverter in a campervan, you will need the following parts,
- Victron Phoenix inverter
- Double pole consumer unit
- 3-pin plug
- 230V Socket(s)
- Red/Black Single Core Wire
- 3-core Artic Flex Cable
- Earth Cable
- Midi Fuse Holder with Midi Fuse
- Unisolated Lugs
NOTE: The wire and fuse sizes are unique for the 375W Victron Inverter. If installing a larger or smaller inverter, you must use different wire thicknesses and fuse sizes - check the inverter manufacturers' product manual.
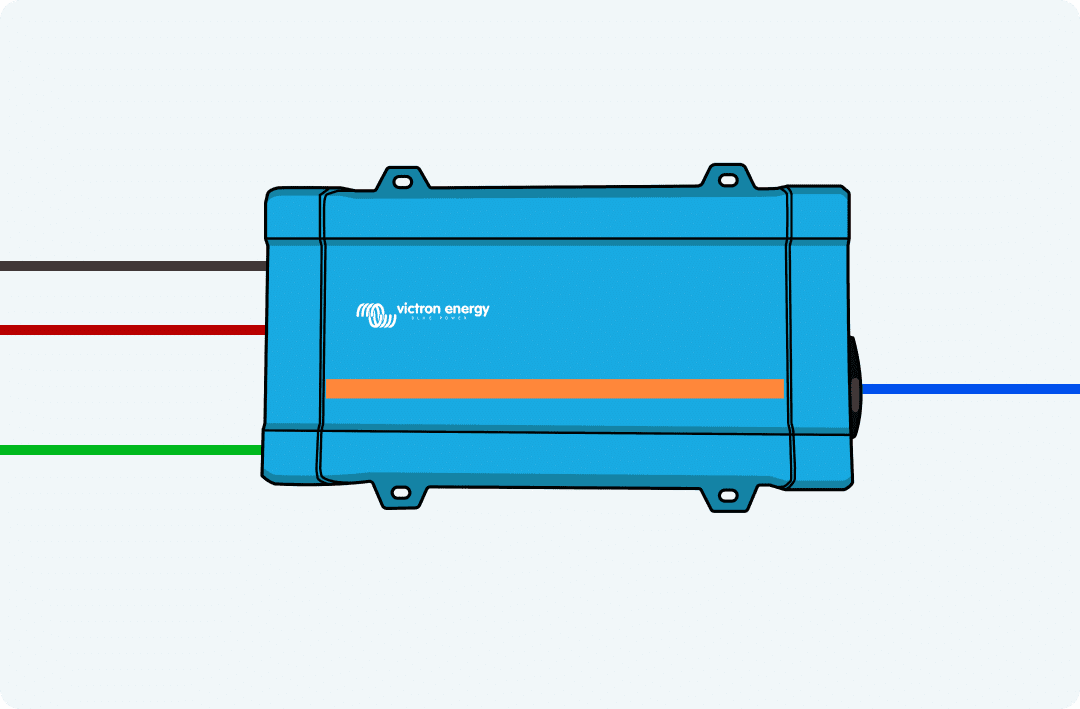
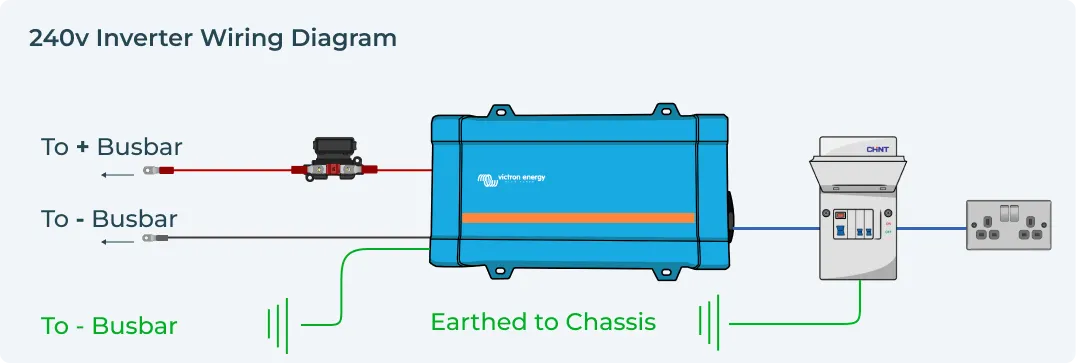
How to Wire Inverter to Leisure Battery
To generate 230V power, we first need to connect the inverter to the 12V battery system. Follow the steps below,
Connecting the inverter to the battery system -
- Securely fasten the inverter to a solid surface using the eyelets provided.
- If not already, Switch the inverter to the off position.
- Run the negative wire from the negative terminal on the inverter to the negative busbar/battery terminal using the unisolated lugs provided.
- Run the positive wire from the positive terminal on the inverter to the positive busbar/battery terminal using the unisolated lugs provided via the midi/mega fuse holder.
- Securely ground the inverter to earth.
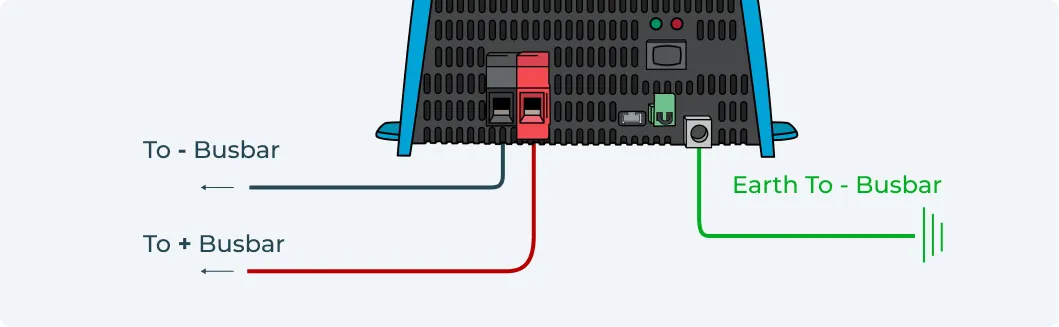
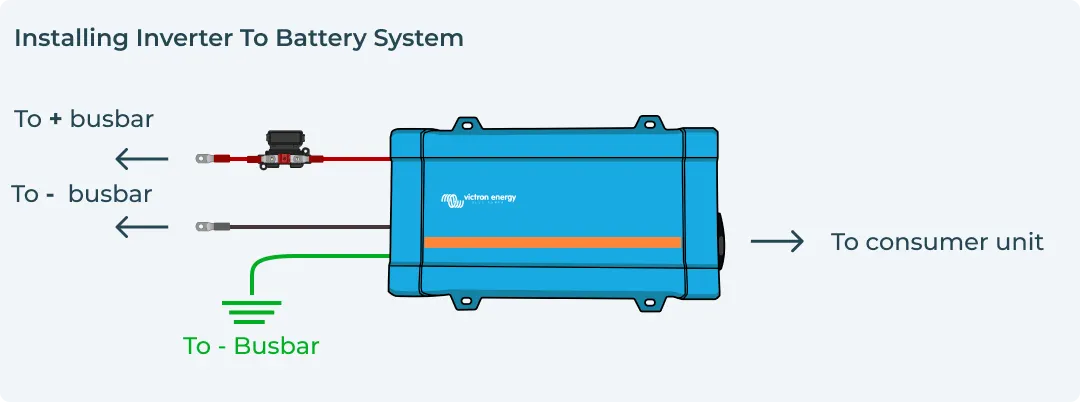
The input of your inverter and battery is now connected. Next, you will connect the inverter output to the consumer unit.
An inverter system kit can simplify your entire wiring setup and ensure all components integrate seamlessly.
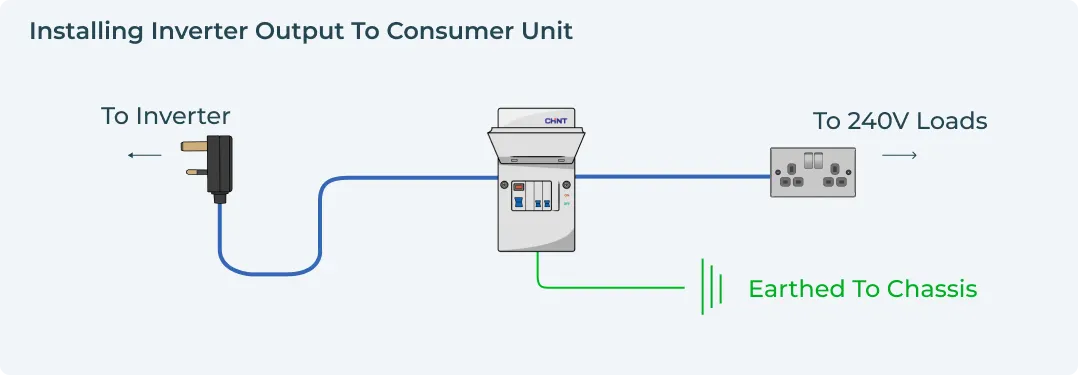
How to Wire Inverter to Consumer Unit
To safely use 230V appliances via a 3-pin socket, it is required that a double pole consumer unit is installed between your inverter and your 230V appliances. The combination of RCD and MCB fuses within the consumer unit is there to protect human life and the circuit.
- RCD: An RCD, or residual current device, is a life-saving device that is
designed to prevent you from getting a fatal electric shock if you
touch a live wire. - MCB: An MCB or miniature circuit breaker are automatic protection devices in the consumer unit that switch off a circuit if they detect a fault. You can reset MCBs if they are tripped.
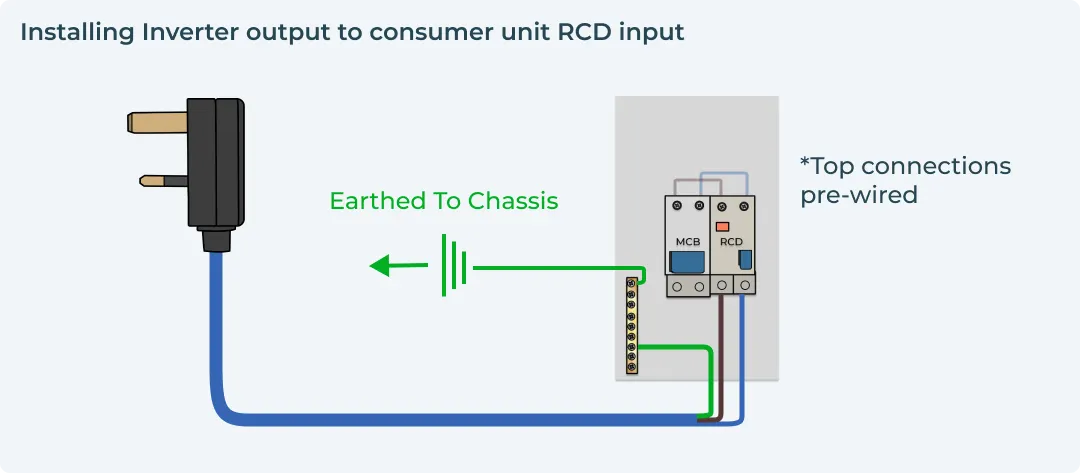
Installing Inverter Output to Consumer Unit RCD Input
Install the inverter output to the consumer unit,
- Ensure the consumer unit has been tripped to introduce a break in the circuit.
- Strip one end of the 2.5mm 3-core wire so that each wire is exposed (live, neutral & earth) and connects it to the 3-pin plug. Ensure each wire is connected to the correct terminal in the 3-pin plug.
- Run the wire with the plug attached from the inverter socket to the consumer unit, adding some extra wire before cutting.
- Strip the other end of the 2.5mm 3-core wire, so it is ready for installation within the consumer unit.
- Connect the green and yellow earth wire to the Earth connection within the consumer unit.
- Connect the blue neutral wire to the neutral connection on the RCD.
- Connect the brown live wire to the live connection on the RCD.
- Earth the consumer unit by running an earth wire from the consumer unit to the vehicle chassis
Installing Consumer Unit MCB(s) to Output Socket
Next, we need to connect the socket connections to the MCB to create a fused circuit.
- Ensure all sockets are turned off, and all 230V appliances are removed.
- Measure the distance between the sockets and the consumer unit cutting the wire to size.
- Strip one end of the 2.5mm 3-core wire ready for installation within the consumer unit.
- Connect the green and yellow earth wire to the Earth connection within the consumer unit.
- Connect the blue neutral wire to the neutral connection within the consumer unit.
- Connect the brown live wire to the live connection on the MCB.
- Strip the other end of the wire and connect it to your double socket. Ensure each wire is connected to the correct terminal.
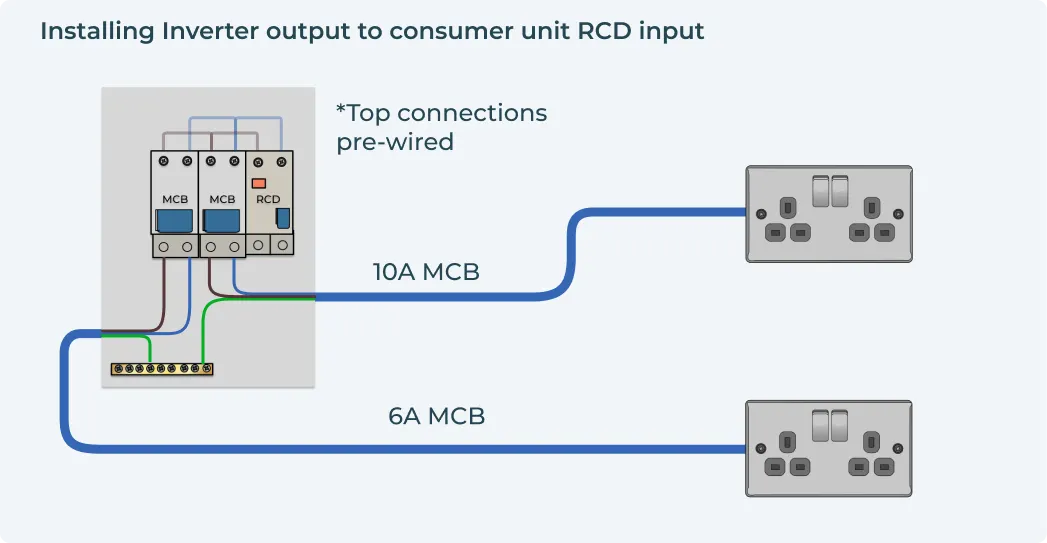
Top Tip
Depending on which consumer unit you opted for you will have either one or two MCB’s.
We recommend the 10Amp MCB being connected to a double socket and the 6Amp MCB being connected to a single socket.
Campervan Inverter Final Check
You have connected the inverter input to the battery system and the inverter output to the consumer unit system.
Double-check that you have wired your inverter to match the wiring diagram below.
Now it is time to check your inverter is wired correctly and working:
- Switch the Consumer Unit on. This will complete the circuit between Leisure Battery and 230V Sockets
- Turn the inverter on - a solid green LED will illuminate on the inverter
- Connect a light to your 230V socket, and turn it on - the light will shine.
Congratulations, you have successfully installed and wired your campervan Inverter and are ready to hit the road!
If your inverter system is not working, follow these steps again. If you are stuck, please get in touch. We are always happy to help.
Buy Campervan Inverter Systems
Are you worried about wire and fuse sizes? Want your Campervan Electrical System to be designed by an expert? Look no further. All our Inverter Systems come with all the wires, fuses, consumer units, lugs and heat shrink you need to install in your campervan...
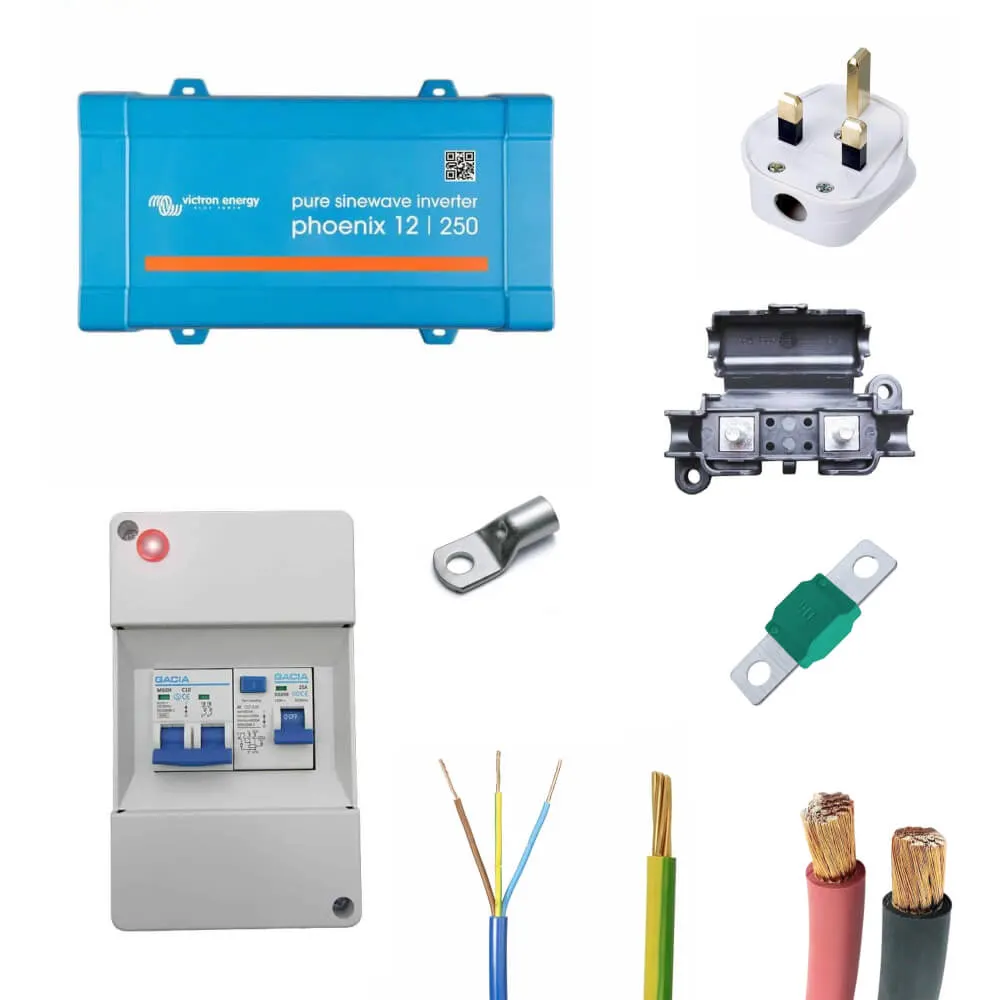
250VA Victron Phoenix Inverter System
£209.99
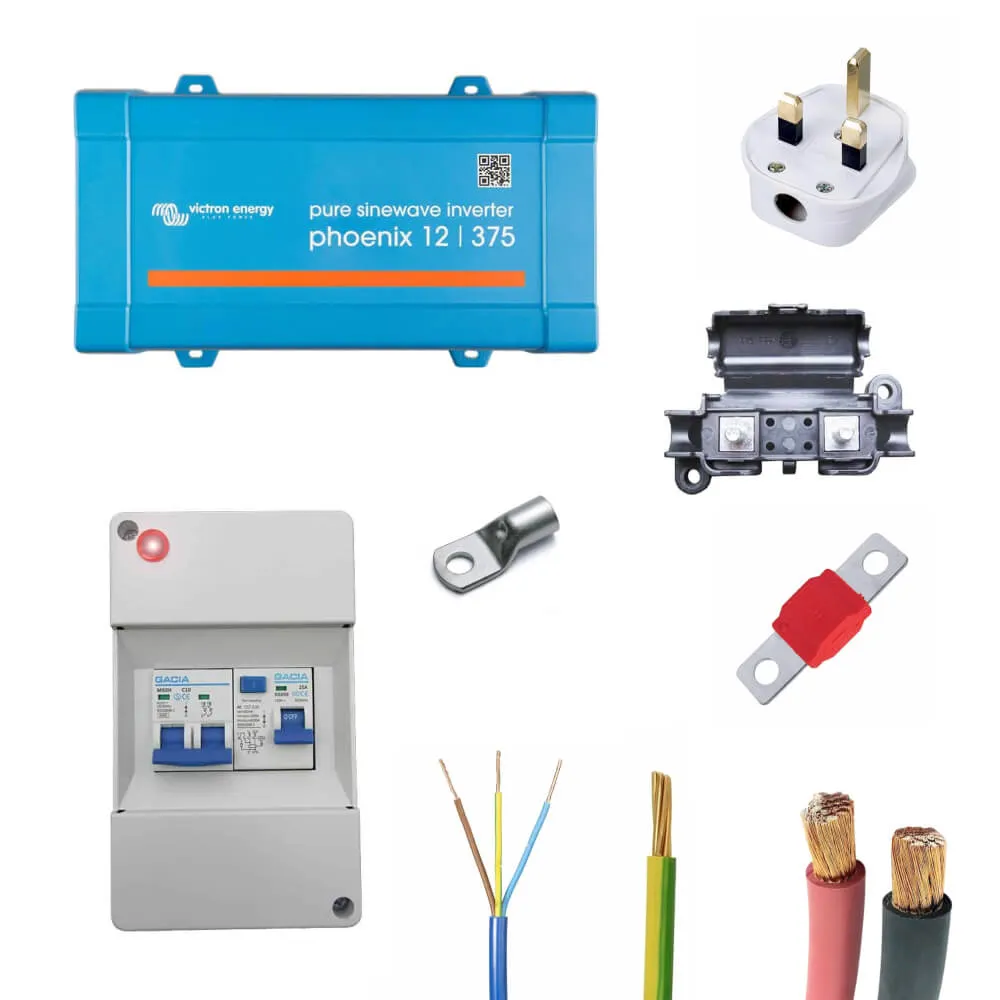
375VA Victron Phoenix Inverter System
£229.99
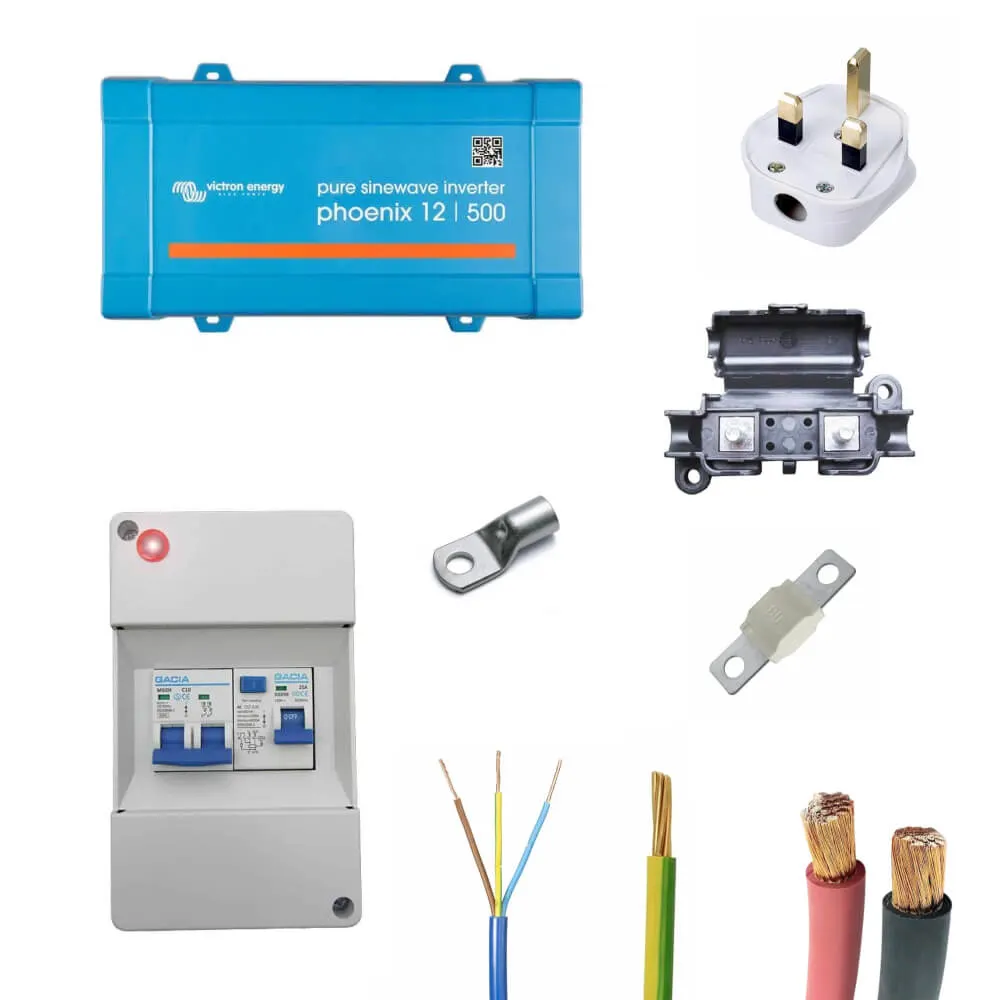
500VA Victron Phoenix Inverter System
£279.99
800VA Victron Phoenix Inverter System
£429.99
1200VA Victron Phoenix Inverter System
£509.99
1600VA Victron Phoenix Smart Inverter System