
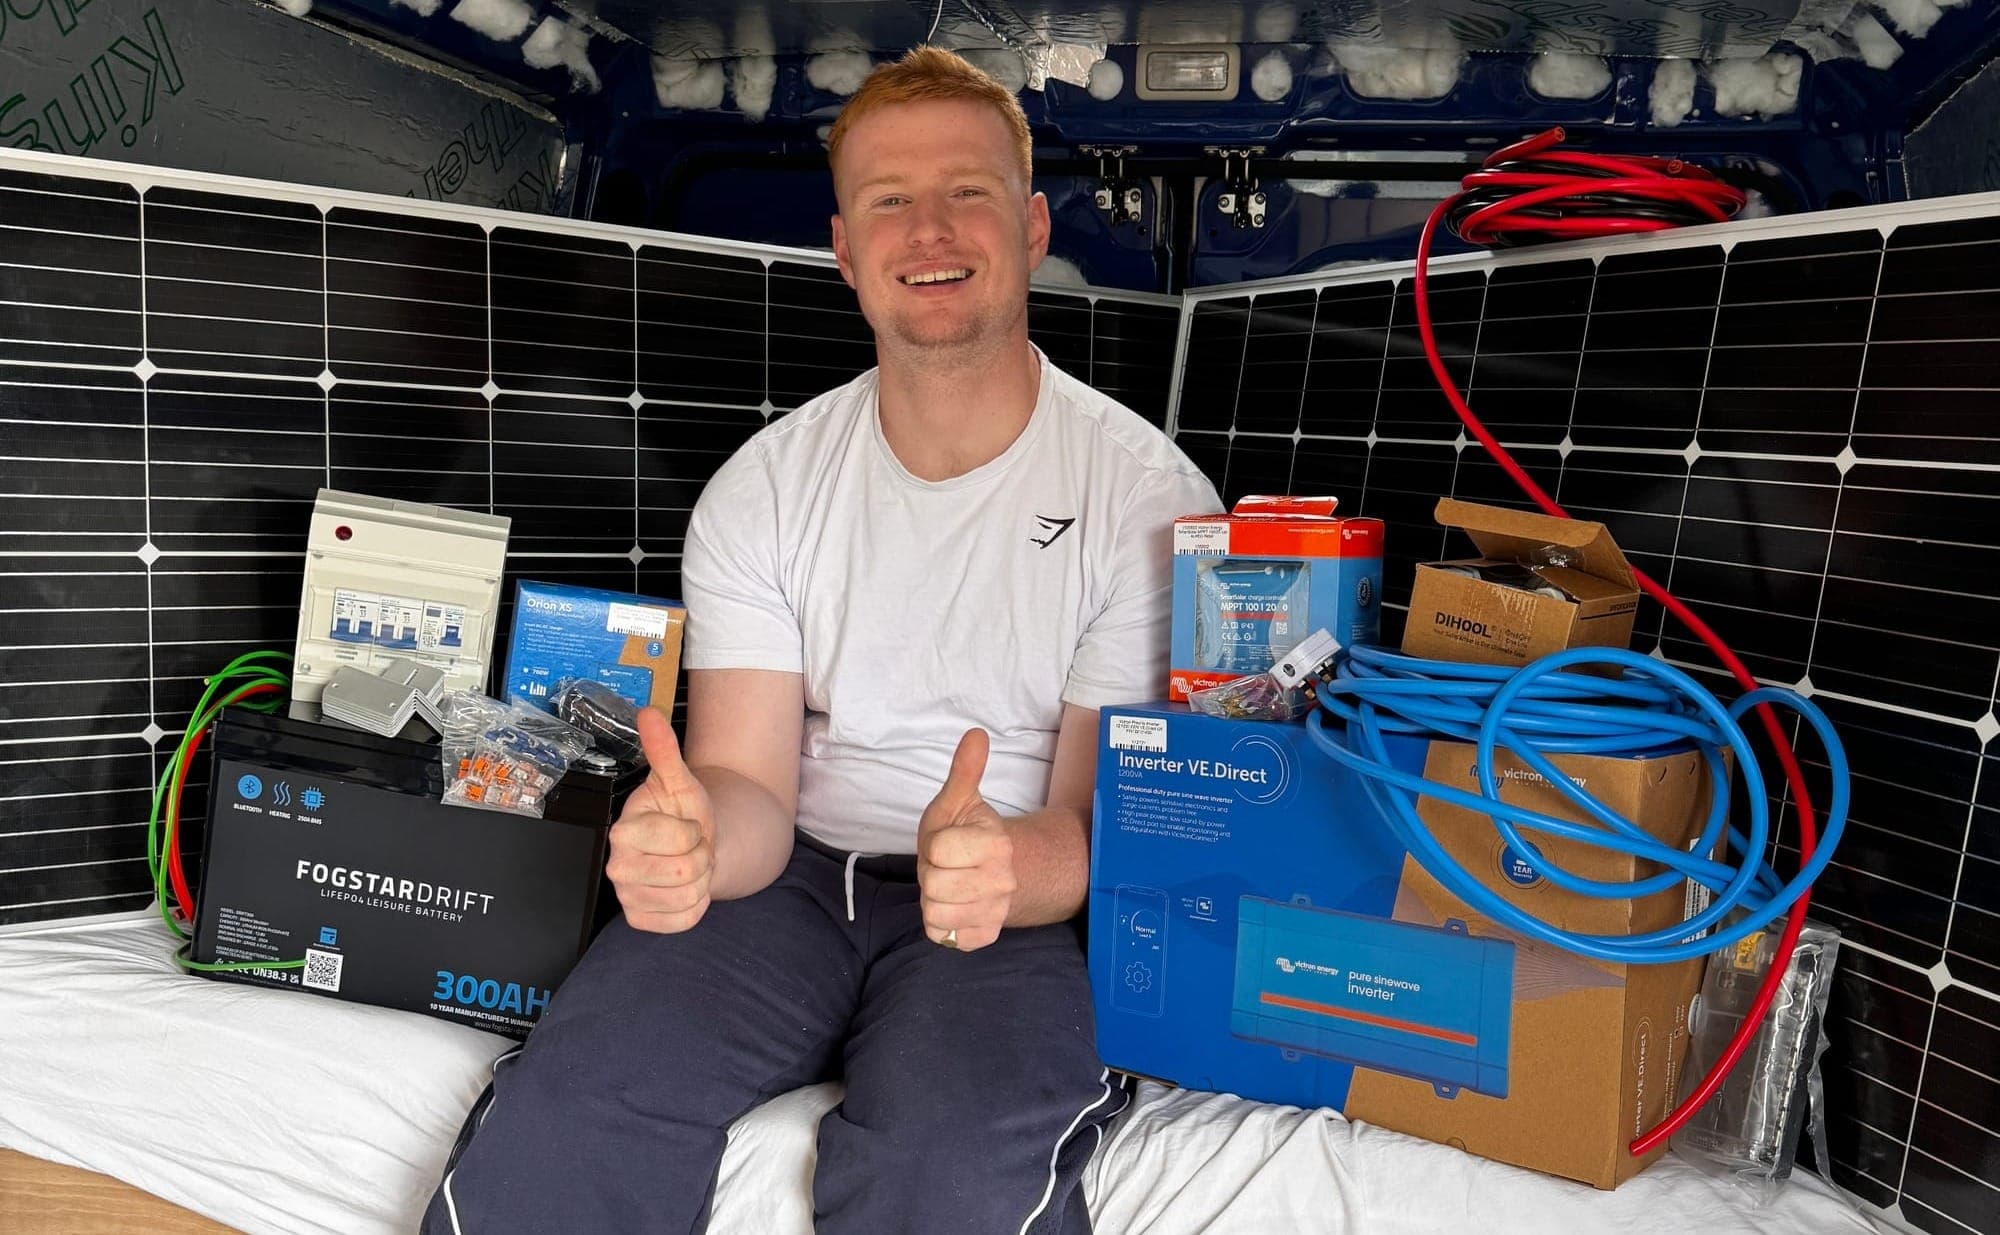
Installing a leisure battery
Your batteries are the heart and soul of your electrical system. In practical terms, leisure battery wiring means connecting a leisure battery into your campervan electrical system, usually by one of four layouts: directly to the battery terminals, through busbars, with combi fuse holders, or with a Victron Lynx Distributor, each with its own pros and cons. A leisure battery is built to discharge slowly for prolonged use when you're parked up running loads like a fridge, lights, or laptop, unlike the vehicle battery, which is there mainly to start the engine and handle short high-current demands.
If you're a DIY campervan or van-life builder in the UK or EU, especially on your first or second conversion, this guide will help you choose a wiring method that fits your van, your spec, and the way you want to use it. We will look at the main ways to connect the battery itself, and the charging systems you create around it too, including split charge setups, split charge relay and relay-based systems, charging a leisure battery while driving with DC-DC chargers for smart alternator vehicles, 240V mains hook-up, and solar power from a solar panel.
It's worth noting here that connecting your batteries is very nearly the last thing you'll do in your van conversion. Good leisure battery wiring is what makes the whole system safe, reliable, and efficient, so you avoid flat batteries, fire risk, poor charging, and expensive wiring mistakes when you arrive on site or go off-grid for hours or days at a time. If you hook them up while your van sits in the driveway being worked on for another two months, you're sure to drain them accidentally. Plus, the less live equipment you have in your van while walking around with an electric drill, the better, and before any wiring work starts, disconnect the main battery earth lead to stay safe.
The Four Ways To Connect Your Campervan Leisure Battery, Including Split Charge Relay
There are four ways to install a leisure battery to your electrical system, each with its pros and cons (click to jump to your section) :
Click to jump straight to our summary.
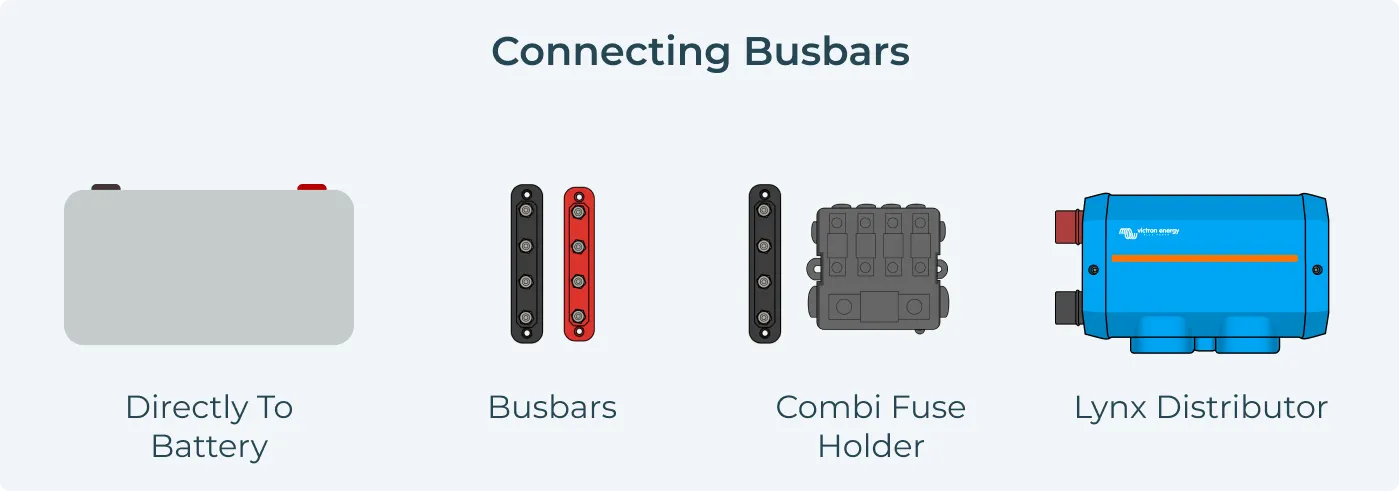
Directly To The Battery Terminals
Who Should Use This Method?
Suitable only for minor electrical systems, connecting directly to the battery terminals helps achieve a no-nonsense, streamlined system.
If you're powering a few 12V appliances like USB chargers and lights and only have one method of charging, this could be your solution; most modern campervans typically use a dc charger, while a mains hook or a battery and solar panel kit for your campervan with a solar controller are other common options.
Typically only suitable for day/weekend van users.
How To Connect Directly To The Vehicle Battery
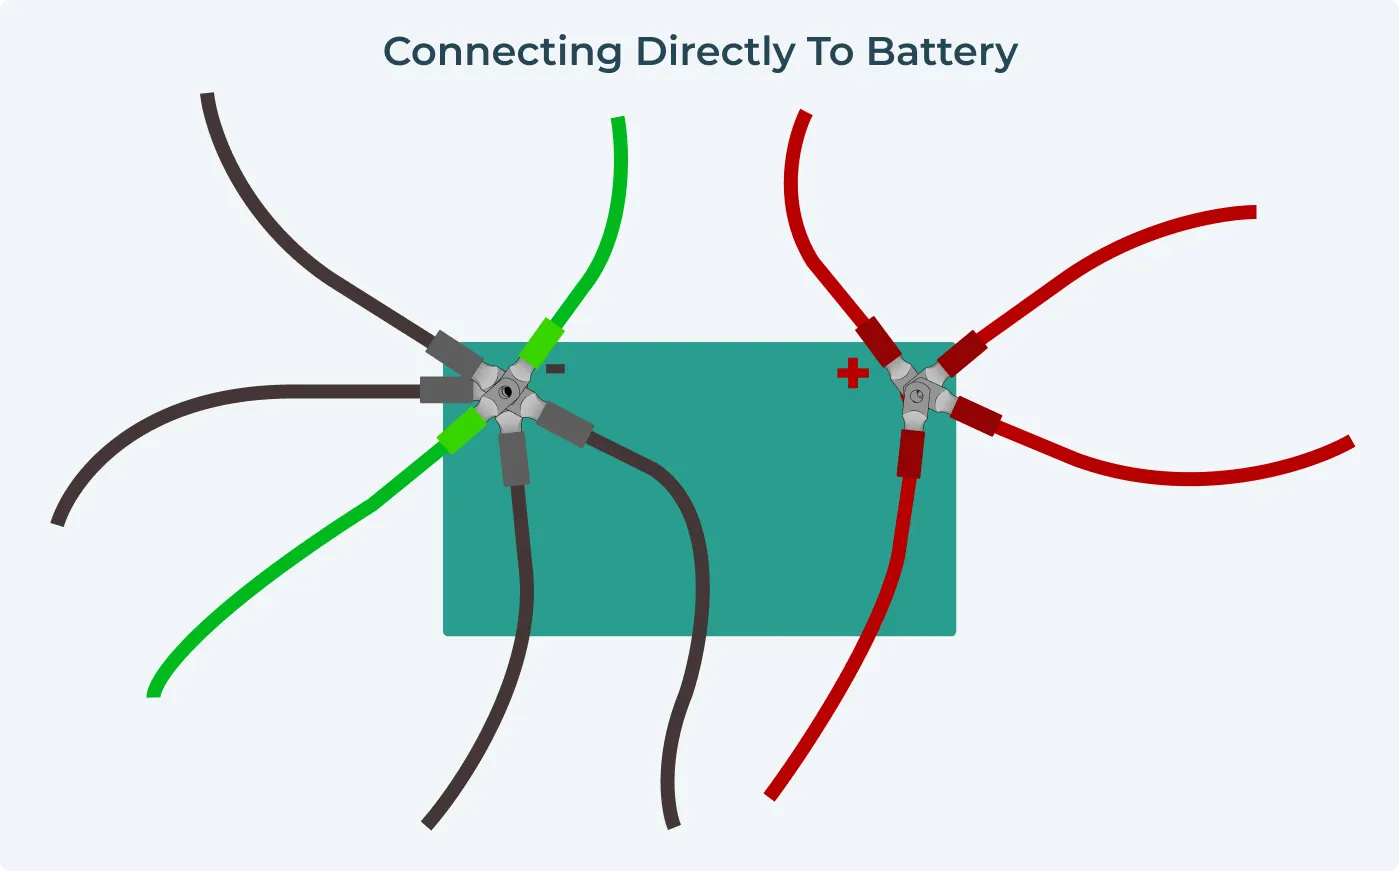
This is the most straightforward solution to install a leisure battery from an installation perspective (but not the best, in our opinion). You will place the lugged wire ends of your charging and/or 12V output wires directly onto the battery terminals. Then make sure to screw the top back on the battery terminal tight, leaving a secure connection. The correct cable size depends on charger current and cable length.
A leisure battery kit for campervan or similar kits can be a convenient option that helps simplify installation and ensure everything works together correctly.
Advantages of Connecting Directly
- Cheap - you'll need significantly less cable and fewer parts to connect this way, making it the cheapest and simplest option for small systems
Disadvantages of Connecting Directly
- Fire Risk - This approach results in a high resistance connection, which can be a fire risk
- Drains Batteries - Reduces the effective current flowing through your circuit, draining more juice from your batteries.
- Not Suitable For More Than Two Connections - The battery terminals are relatively small, and you will struggle to fit more thantwo2 connections on them without it being a mess.
Connecting Via Busbars
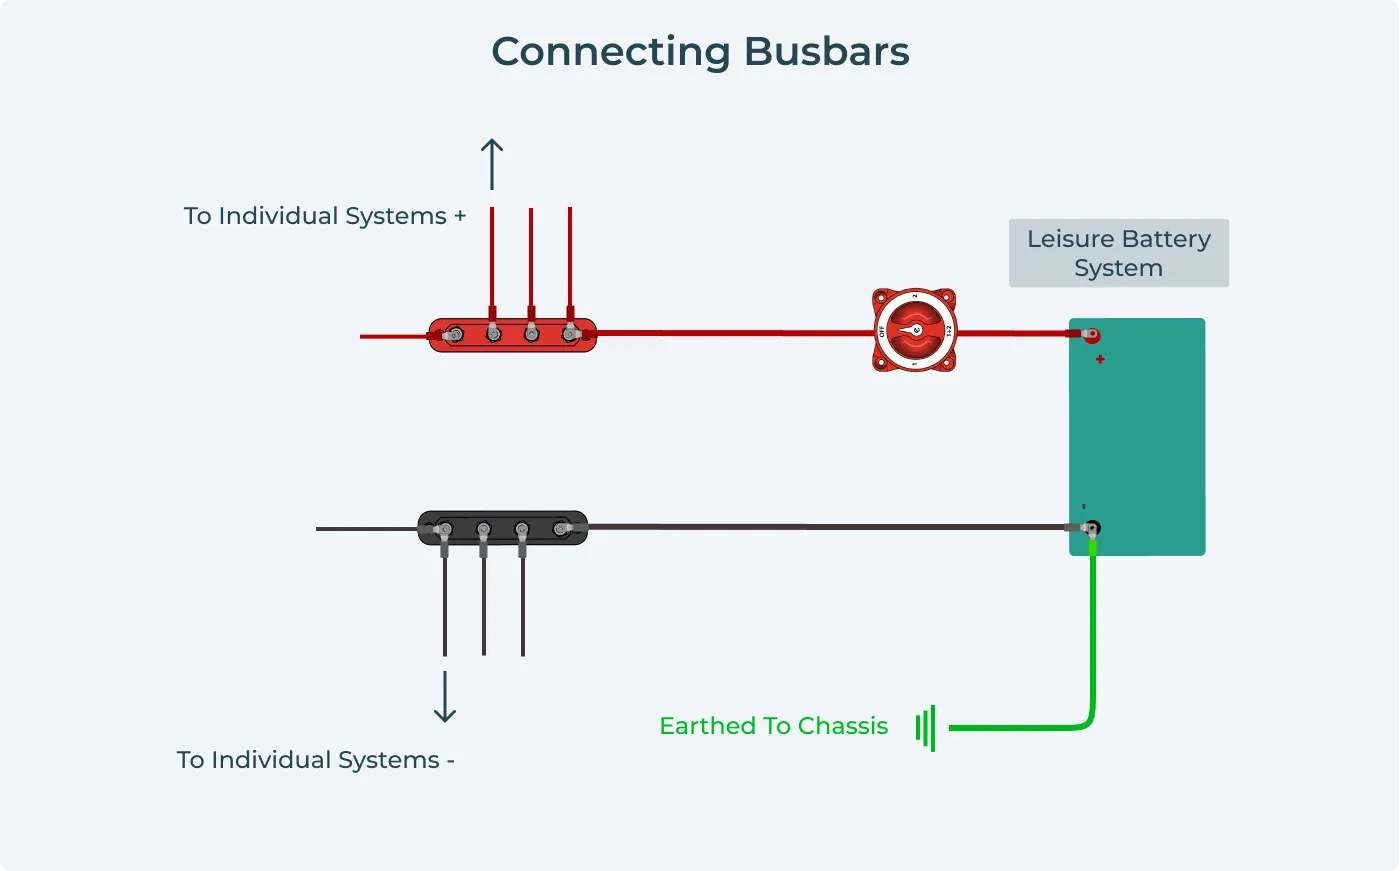
Installing your leisure battery by connecting your batteries to 2 busbars is a favourite method for DIY van converters, as it can create a tidy, reliable layout when components need multiple connection points.
Who Should Use This Method?
This approach is suitable for many electrical systems and will suit everything from small, basic systems to the luxury all-bells-and-whistles model. However, the additional cable lengths and complexity in routing for fuses make this approach less favourable than combi fuse holders or Lynx Distributors for larger electrical systems.
How To Connect Via Busbar
Busbars are essentially an extension of your positive and negative battery terminals, providing several connection points where your batteries have just one. You should mount the busbars to a solid surface and fix cabling so it cannot move around in the van, especially when they feed into your wider campervan 12V wiring diagrams and fuse layouts. In a bus conversion, negative cables should return to a central grounding point for safety.
Advantages of Using a Busbar
- Relatively Inexpensive - Provides four extra battery terminal connections at a reasonable price.
- Easy Positioning - You can position the busbars in the most convenient locations for your electrical system components, meaning that shorter cable lengths and more straightforward cable routes can be achieved.
Disadvantages of Using a Busbar
- Potentially Many Points of Failure - Each positive busbar connection requires its MIDI fuse holder. This system introduces the most significant number of connections. Each link is a potential point of failure in your system, so less is better. However, lugs do not typically fall off your busbars if they're connected properly. Any configuration should be able to stand the test of time if connections are made and tightened correctly, so don't stress too much about this.
- Takes up lots of space - The cable routes can still end up still need to fuse each of the positive cables leaving the busbar. This can take up a lot of space, if you are tight for space we recommend using a Combi Fuse Holder
Connecting Via Combi Fuse Holder or Fuse Box
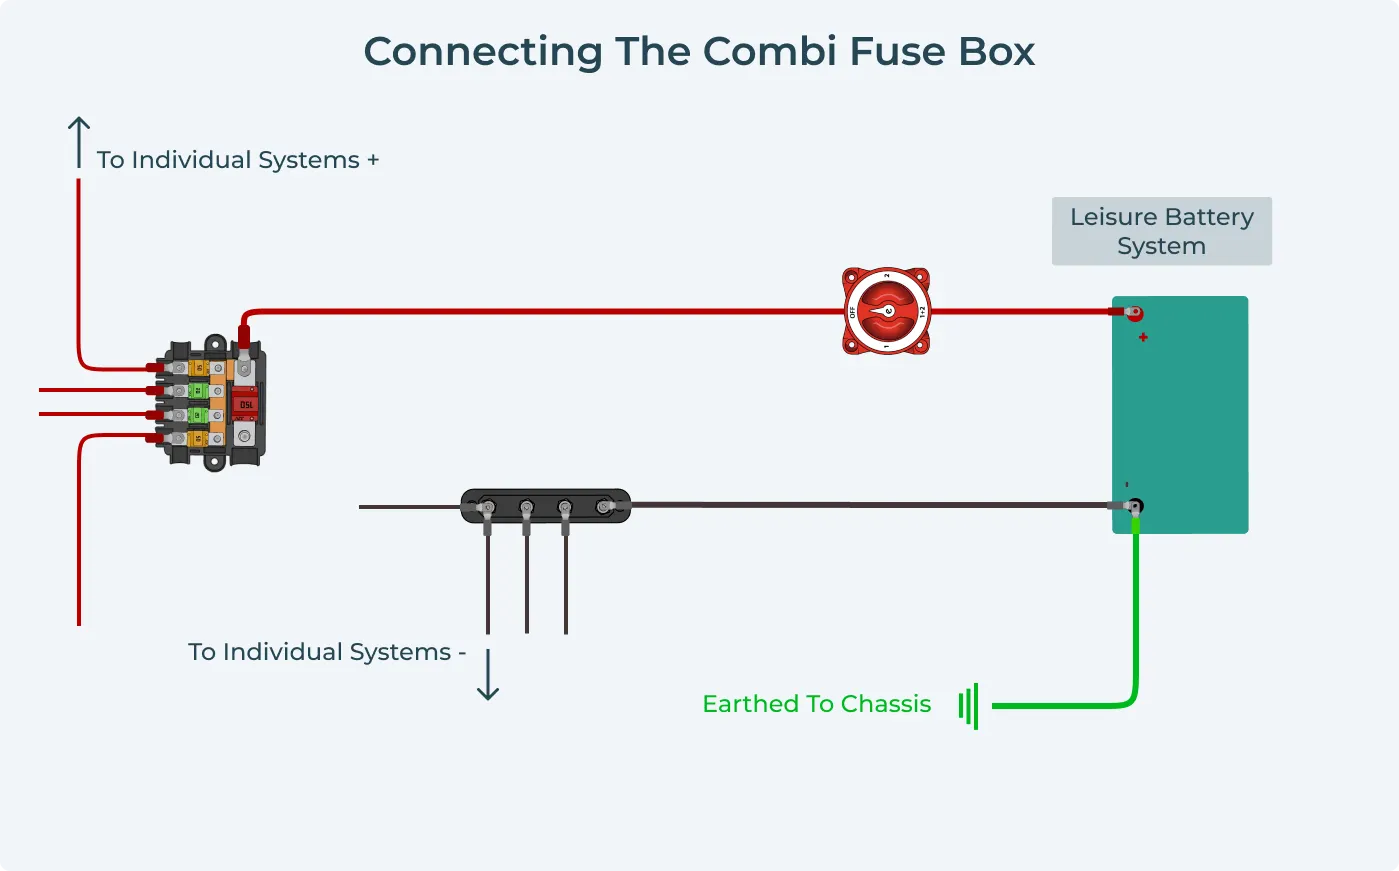
Combi fuse holders are our most common connection method and essentially bring the positive busbar and MIDI fuses under one roof. Of course, you'll still need a negative busbar which has been earthed, but all the cabling between the positive busbar and the individual fuses is removed and replaced with a simple, tidy fuse holder.
Who Should Use This Method?
We usually recommend installing your leisure battery with this approach as it makes for a much more elegant electrical system design than using two busbars but without the added cost of a Victron Lynx Distributor, particularly if you're still getting to grips with the basics of campervan electrics and system design.
Unfortunately, combi fuse holders are only rated to 200A, so they cannot be used with inverters larger than 1200VA. In this case, we recommend a Victron Lynx Distributor, which can handle a whopping 1000A, or one of our complete Victron campervan electrical systems if you want a fully integrated setup.
How To Connect Via Combi Fuse Holder?
The Combi Fuse Holder is a busbar with built-in terminals to attach your fuses. Your positive cable will connect from your battery's positive terminal to the combi fuse holder. Your negative cable will connect from your negative battery terminal to your busbar. Keep the 12V DC wiring around the holder separate from any 240V AC wiring to meet safety standards, especially if you're also mounting a new fuse box nearby.
Advantages of Using the Combi Fuse Holder
- Reduced points of failure - This reduces the number of connections compared to the busbar system, giving fewer potential points of failure.
- Easier to install - A combi fuse holder reduces the connections you have to make when installing your electrical system by around 50%, depending on your exact system. Each connection must be stripped, crimped and wrapped in heat shrink before being terminated, so this saving represents a lot of time for the installer!
Disadvantages of Using the Combi Fuse Holder
- Only Suitable for Smaller Systems (Less than 1600W) - Unfortunately, combi fuse holders are only rated to 200A, which means they cannot be used with inverters larger than 1200VA. In this case, we recommend a Victron Lynx Distributor instead, which can handle a whopping 1000A.
Connecting Via Lynx Distributor
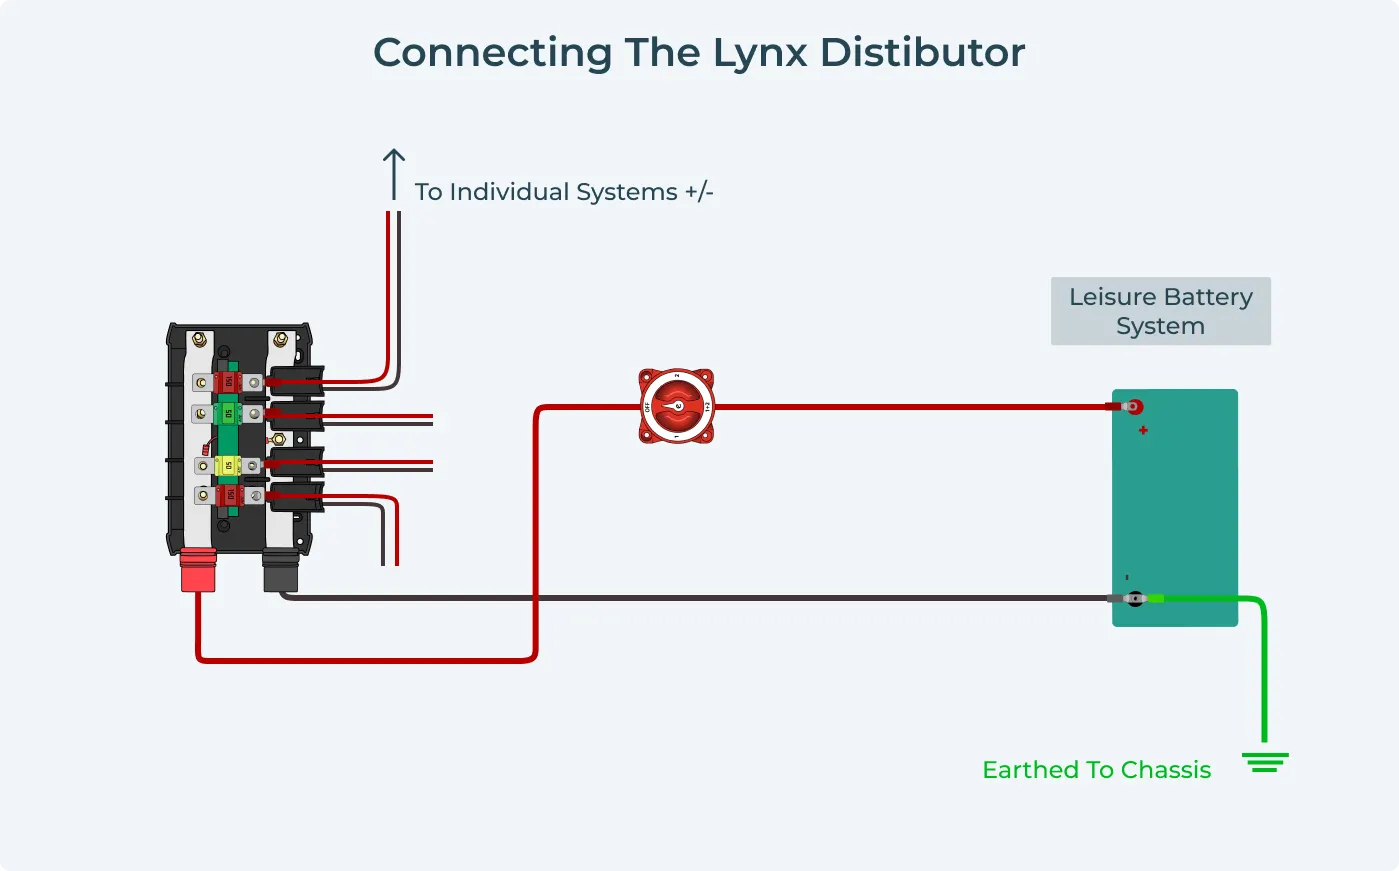
Victron Energy have done it again with the king of battery connection methods, the Lynx Distributor. While adding an extra cost (approximately £80 extra) to your electrical system, the Lynx Distributor is essentially a positive busbar, negative busbar and fusebox under one roof. This makes it super easy to install your leisure battery to the rest of your system.
Who Should Use This Method?
If anyone wants a fully decked campervan electrical system, then the Victron Energy Lynx Distributor is what you want! It provides the simplest, most elegant option for electrical system design, saving significant time during installation. If suitable for your system, it is by far the best approach.
How To Connect Via Lynx Distributor?
If anyone wants a fully decked campervan electrical system, then the Victron Energy Lynx Distributor is what you want. Mount it close to the leisure battery, run the main positive feed into the Lynx, and take each fused outgoing circuit to your charger, inverter, and 12V distribution, with the negative returns going back to your common busbar or shunt. If you are using more than one leisure battery in the same process, wire them in parallel to increase amp-hour capacity while keeping the system at 12V. If the battery bank sits at the rear, use identical battery type and capacity to avoid resistance imbalance across the bank. A traditional campervan split charge relay is the relay-style switch that connects the vehicle battery and leisure battery together when triggered by ignition or voltage, and a voltage sensitive relay typically closes when the vehicle battery reaches 13.7vDC, using the alternator while the engine is running. On a modern vehicle with a smart alternator, most setups now use a DC to DC charger wiring configuration or a smart relay instead of a basic split charge relay because voltage can vary.
Advantages of Lynx Distributor
- High Current Rating - Its high current rating of 1000A. This is ideal for power-hungry appliances such as large inverters or induction hobs.
- Least Parts and Connections - As the positive and negative wires, alongside fuses, are attached directly to the lynx distributor, it has the least number of connections, making it the easiest to install.
- Easy Install- Due to the low number of parts, you will have this installed in no time.
Disadvantages of Lynx Distributor
- Maximum Four Connections - The pitfall of the Lynx Distributor is the maximum capacity of four fuses and four connections (not including the battery). You can use multiple Lynx Distributors or a combi fuse holder if you have more branches in your electrical system.
- Expensive - With performance comes the price. The Lynx Distributor is the most expensive option due to its high current rating and use of Mega fuses.
How To Install A Leisure Battery Summary
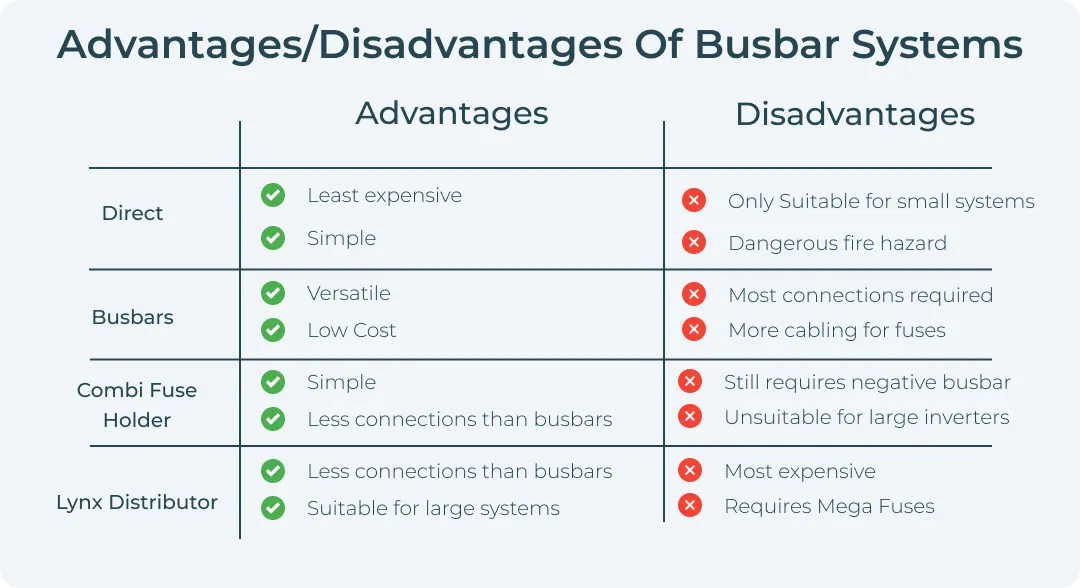
There's no correct way to install your leisure battery. The optimum solution for your campervan conversion will depend on your electrical system and what's important to you. These options can work effectively for various electrical system designs, so don't stress too much about the absolute best choice, especially if you follow a structured DIY campervan electrical system checklist.
Still Unsure About Your Campervan Electrical System?
Still unsure of how to connect to your batteries? Our Campervan Electrical System Builder and build your own campervan electrical kit tool help you choose between options for a camper or camper van setup, like DC-DC charging, split charge kits, solar power with weekend trickle support when parked to extend the usable range of your off-grid setup, and a mains hook-up based on what you want to include in your system for reliable power while camping. You can also opt for a complete campsite hook up campervan electrical system if you mainly stay on sites, so you can plug into site power safely.
As always, if you want to speak to someone about your electrical system and get some advice from the experts, give one of our team a ring now! So why not give it a go today for a free wiring diagram and quote, so you can arrive at a campsite with lights, sockets, and other accessories powered, and keep devices such as a phone charged, without the worry of flattening the starter battery?